How to add Ledger in Nevino Billing Software

Ledger is a very important part of Accounts used to maintain the records. So now we learn how to add Ledger in Nevino Billing Software.

Click Here To Buy Nevino Billing Software

Learn through below video how to add ledger in Nevino Billing Software.

How to add party<< Already gone through this page >>How to add item

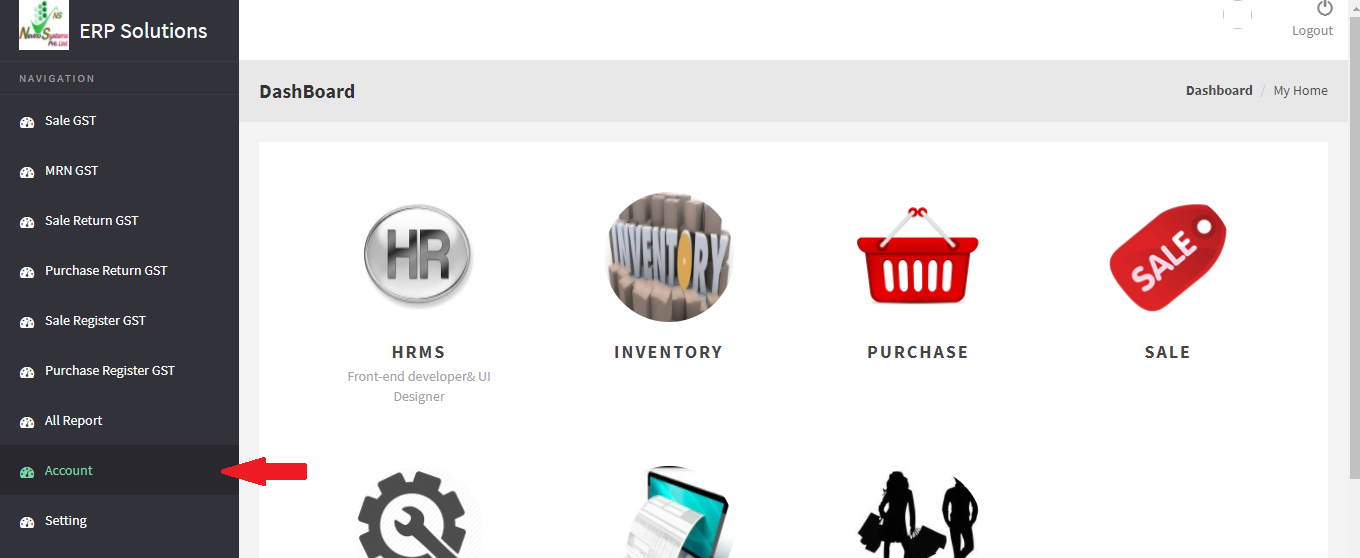
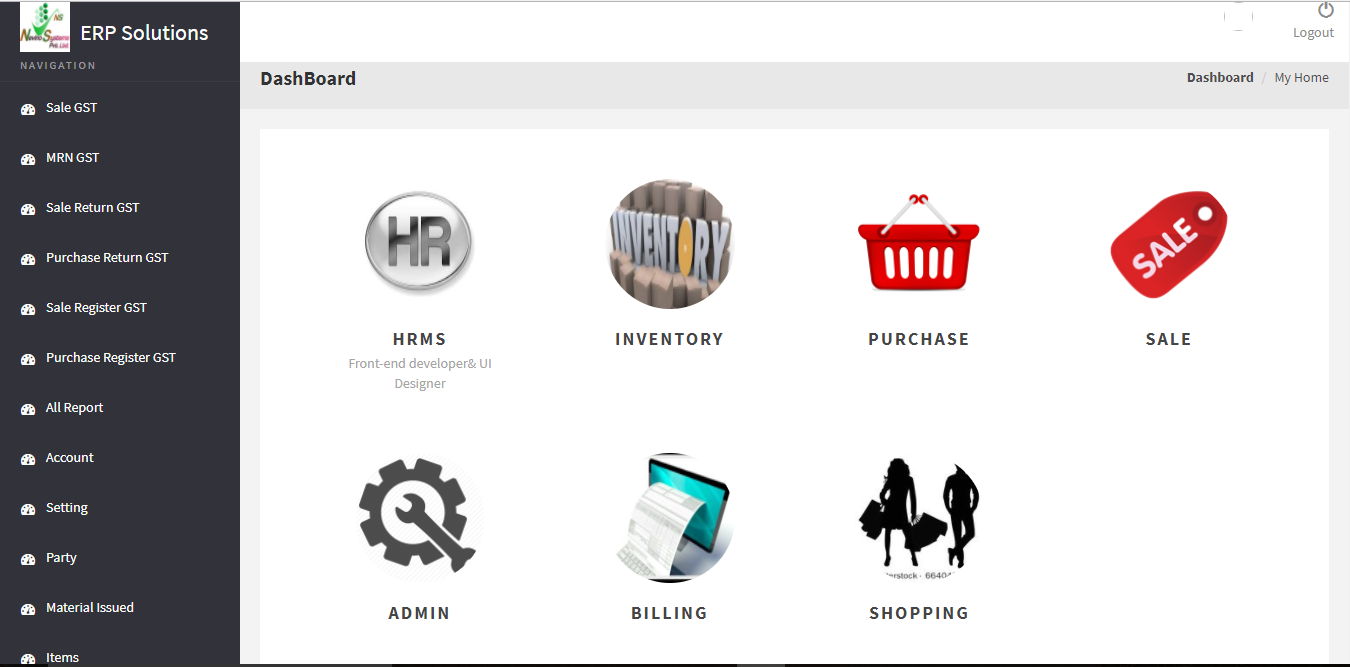
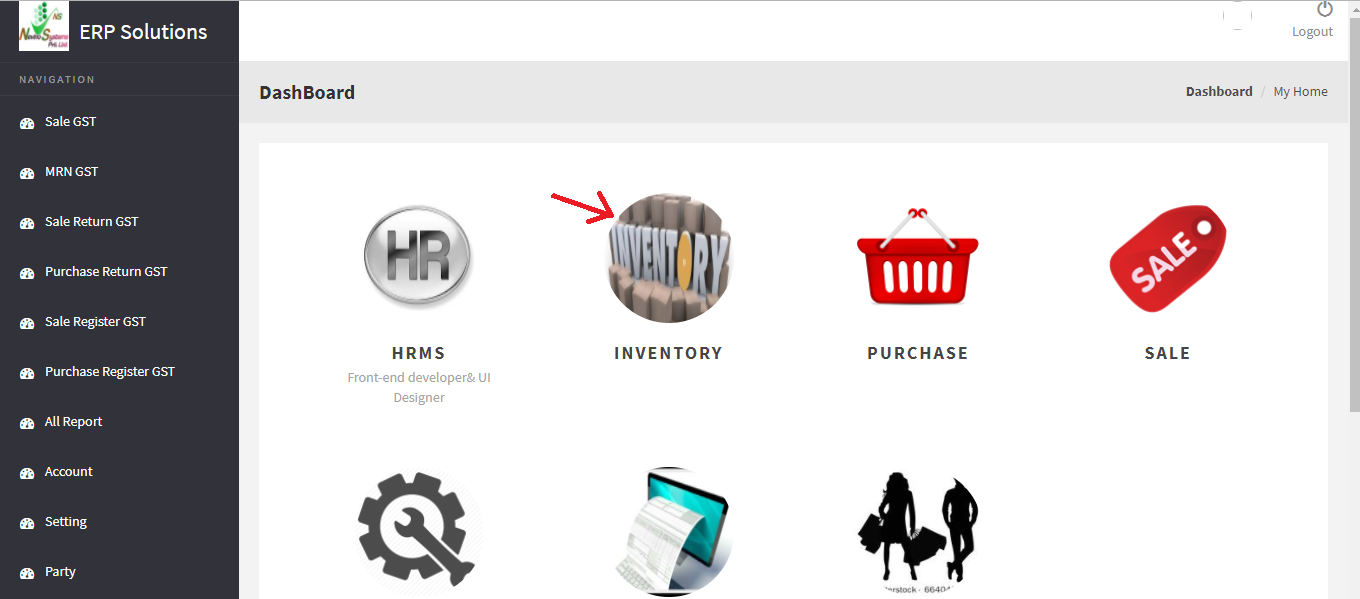
Step 1. In the Nevino billing software main window click on ‘Accounts’ appearing on left side of screen as shown in image below.

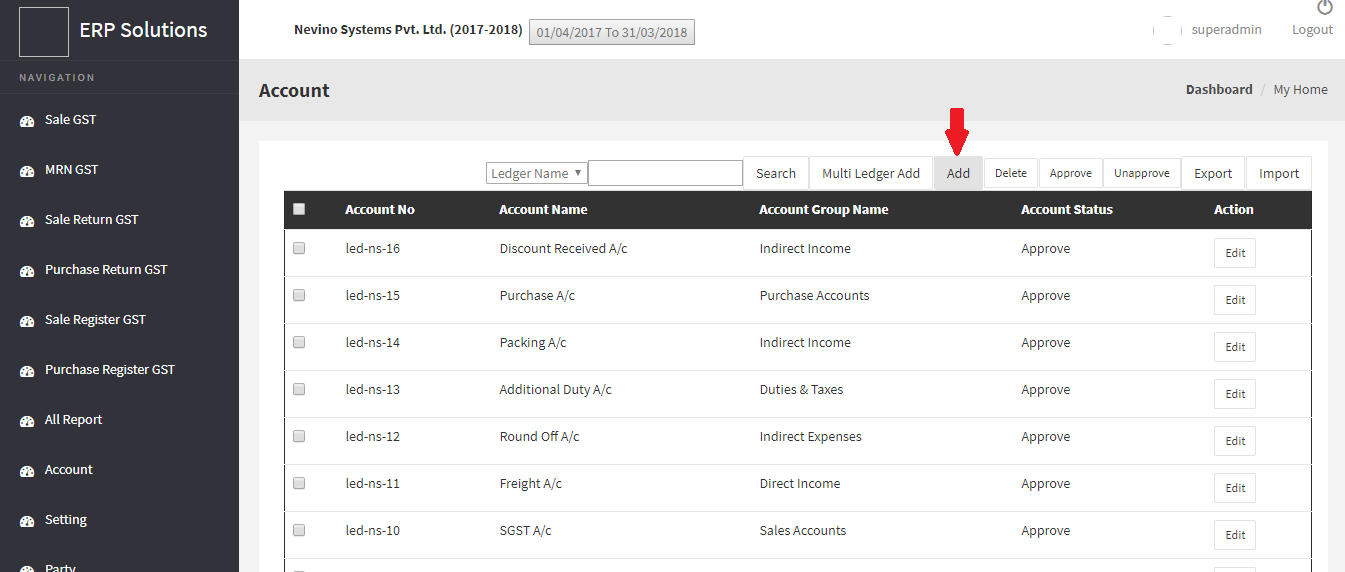
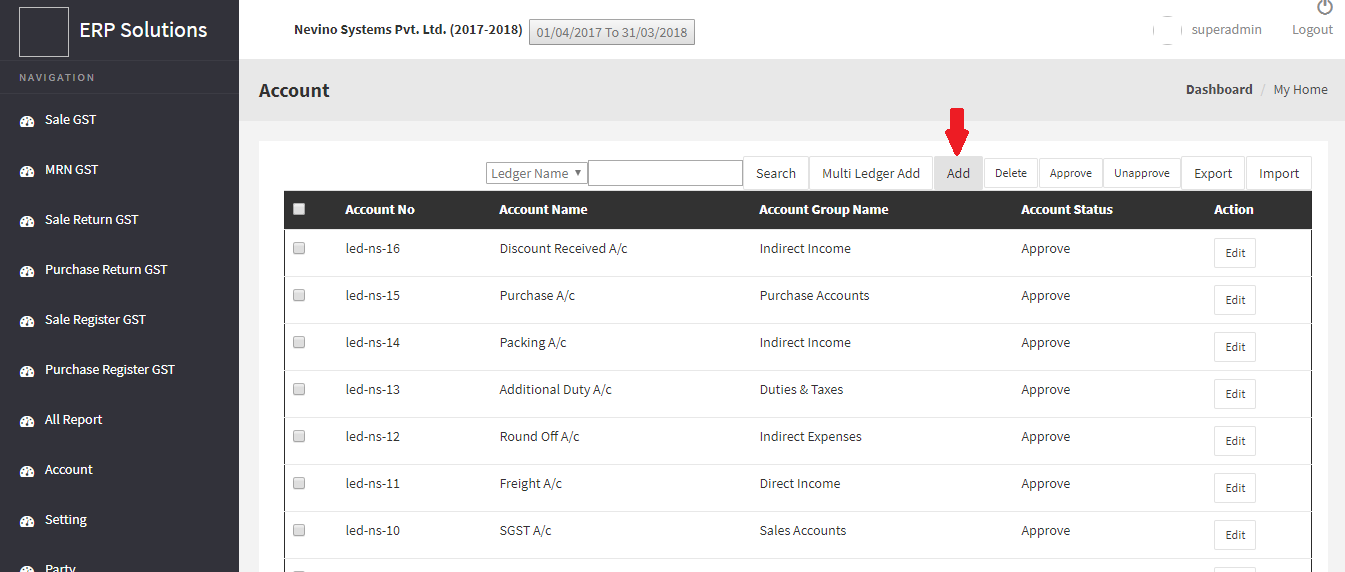
Step 2.Nowclick on ‘Add’ buttonas shown with red arrow in below image.

Step 3. When this ledger account window appears fill in the name and sub group name as shown in image below.

Step 4. After filling up the required information click on ‘Save’ button.

Step 5. When the save button clicked Ledger will be saved and shown under the account heading list as per image below.

Click Here To Buy Nevino Billing Software


Learn through below video how to add ledger in Nevino Billing Software.

* The Content stated above is for informational purpose only. Expert Software Team is not responsible if any part of content found meaningless in any manner or condition.
How to add Party in Nevino Billing Software

Now the Nevino Billing Software is available to work upon. We start with adding the party details and from below lesson we will know about how to add party.

Click Here To Buy Nevino Billing Software

Learn through below video how to add Party in Nevino Billing Software.

How to Login << Already gone through this page >>How to add ledger

Step 1.When below screen appears click on ‘Account’ option appearing on the left hand side of screen as below screen shot.

Step 2. Now screen will appear as below now. You must have noticed company’s name appearing on top of the window. Click on ‘Add’ button appearing in line with other buttons.

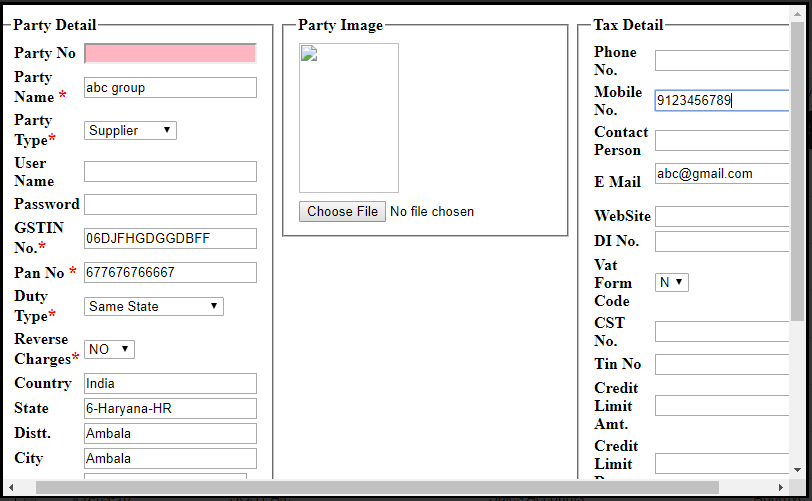
Step 3. When ‘Add’ button is clicked a new window will appear as below where you can add the party details.

Step 4.Enter the party name and sub group name will be the type of account concerned to that party. For example, party name is ‘abc group’ and sub group name as ‘Sundry Debtors’.

Step 5. Now tick on ‘Add Party’ and click on ‘Save’ button.

Step 6. When save button is clicked a new window will open where you can add all details related to that party as per the image below.

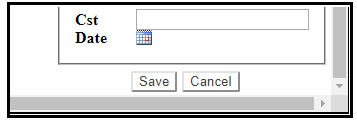
After filling all details click on ‘Save’ button located in lower right corner of the window.

Step 7. Now the details are saved and the party name will be shown as per screen shot below.

Click Here To Buy Nevino Billing Software


Learn through below video how to add Party in Nevino Billing Software.

* The Content stated above is for informational purpose only. Expert Software Team is not responsible if any part of content found meaningless in any manner or condition.

How to add company in Nevino Billing Software

To start maintaining account records first we need to add company name and details to our accounting software. So when you have installed Nevino Billing software to your computer then you can start adding company for your records as below steps.

Click Here To Buy Nevino Billing Software

Introduction to Nevino Billing Software << Already gone through this page >> How to login in Nevino Billing Software
 
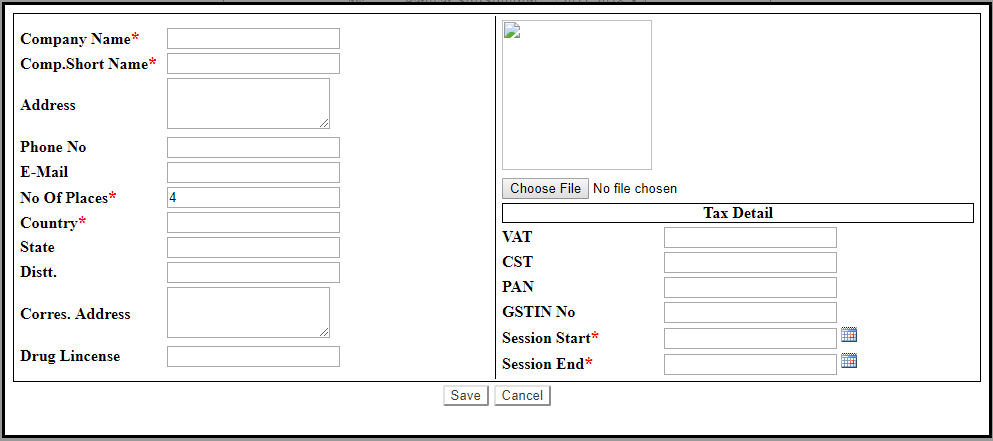
Step 1. After the installation below screen will appear where you have to click on ‘Add Company’ then another screen will be displayed and there you can add details of the company.


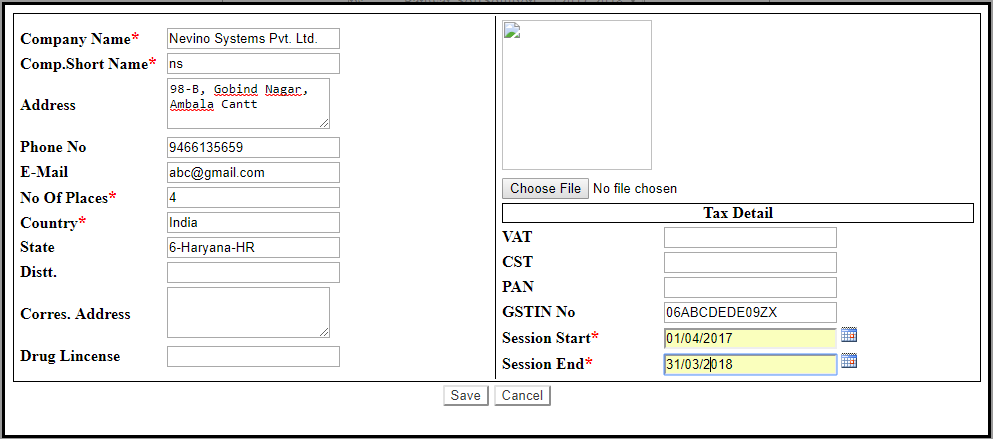
Step 2. The headings indicated with ‘*’ are compulsory to be added. Fill in the details as per screen below starting from the ‘Company Name’ till the ‘Session End’. When you have entered all the details as below then click on ‘Save’ button and company will be created.

 
Step 3. When company is created it will be shown in list as below screen shot.

Click Here To Buy Nevino Billing Software

* The Content stated above is for informational purpose only. Expert Software Team is not responsible if any part of content found meaningless in any manner or condition.
How to block ports in Ubuntu 16.04 Firewall

To safeguard your computer from being hacked, you can block ports of Operating System Linux Ubuntu through its Firewall. You can allow only required ports and block rest of all. To do the same below steps can be followed.
 
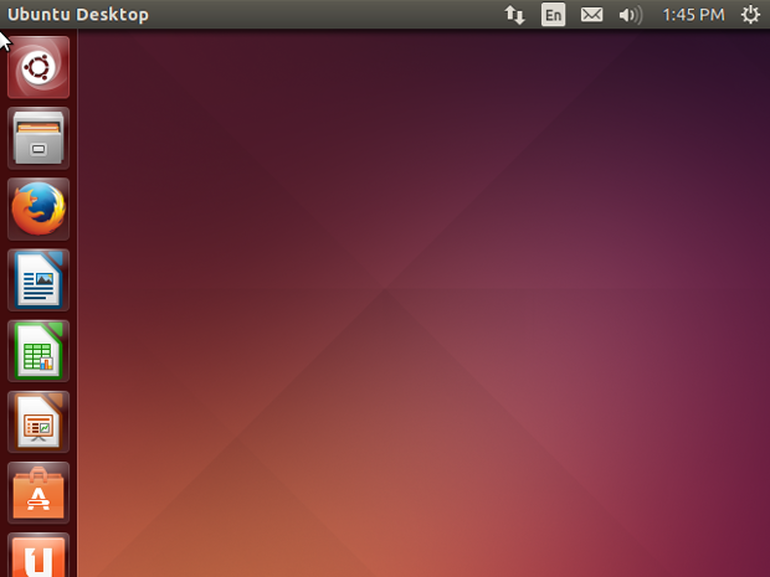
Step 1.Start your computer installed with Linux Ubuntu operating system. When you reached below screen click on first icon i.e. ‘Search button’.

 
Step 2.Firewall configuration icon will be shown. Click on it, an authentication window will appear asking to enter password. When password is typed press enter key.

 
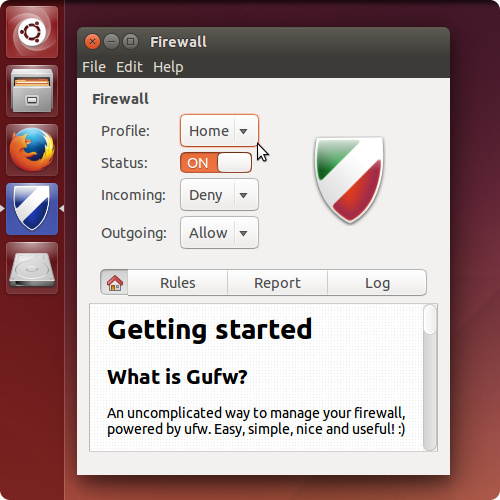
Step 3.Now Firewall window is open as below image.

 
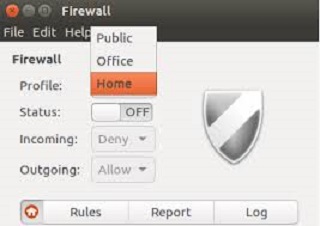
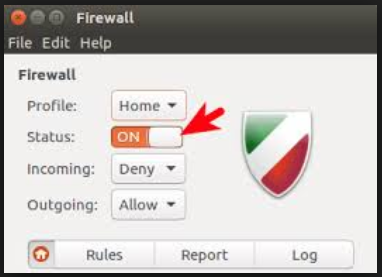
Step 4.There are three types of profile in it namely Home, Public and Office. Set two out of three profile as status ‘off’. For example: Home is your selected profile with status ‘On’.


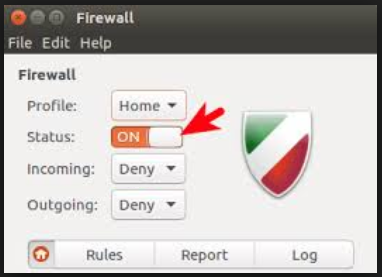
Step 5.Select the incoming and outgoing value as ‘Deny’ as below image. This step will block all the ports of your computer.

 
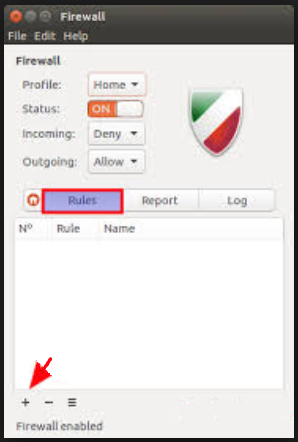
Step 6.As our all ports are blocked now we can allow any port to work upon by using the ‘Rules’ in Ubuntu firewall. So now we learn how to use the ‘Rules’. Just click on Rules a window will appear as below. Click on plus icon ‘+’.

 
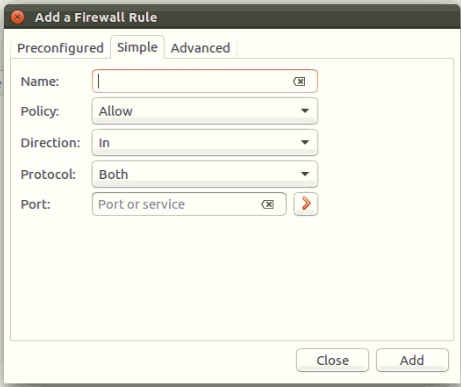
Step 7.Add rule window as below screen shot will appear. Select ‘Simple’ and Policy as ‘Allow’.

 
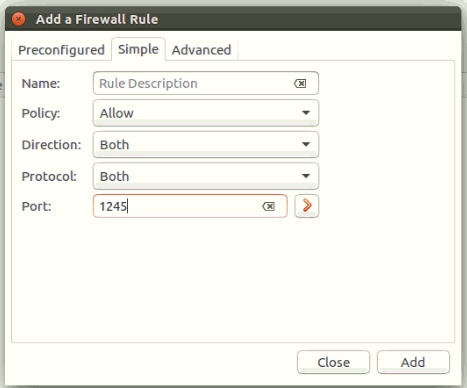
Step 8.Select Direction as ‘Both’ and enter port number for example as ‘1245’. Click on ‘Add’ button and rule will be created.

 
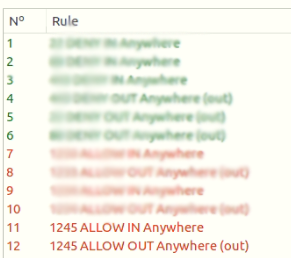
Step 9.Now ‘1245’ port number is open which you can see as below screen shot.

* The Content stated above is for informational purpose only. Expert Software Team is not responsible if any part of content found meaningless in any manner or condition.
Blocking the ports with COMODO Firewall

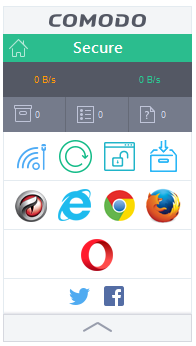
Step 1. As now Installation process completes a COMODO firewall widget window will appear on the right side of your desktop as per below image.
comodo-firewall-rule-added.png

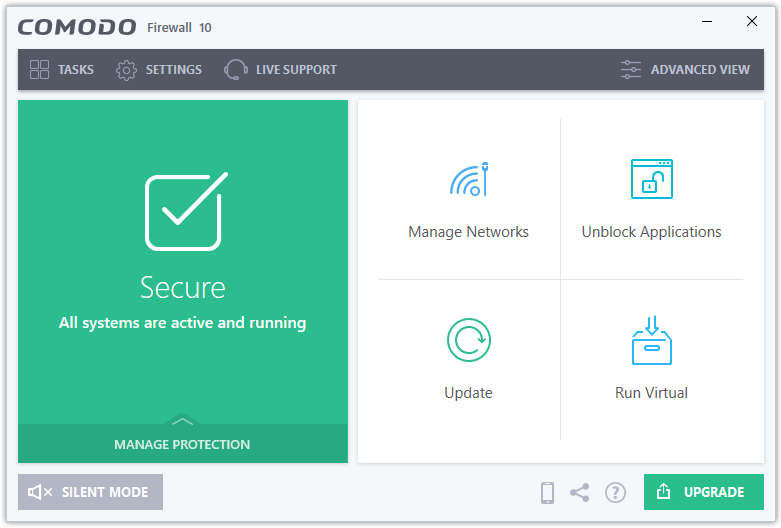
Step 2. Now double click on the window where ‘Secure’ is written. A new window will appear as below.
comodo-firewall-main-window

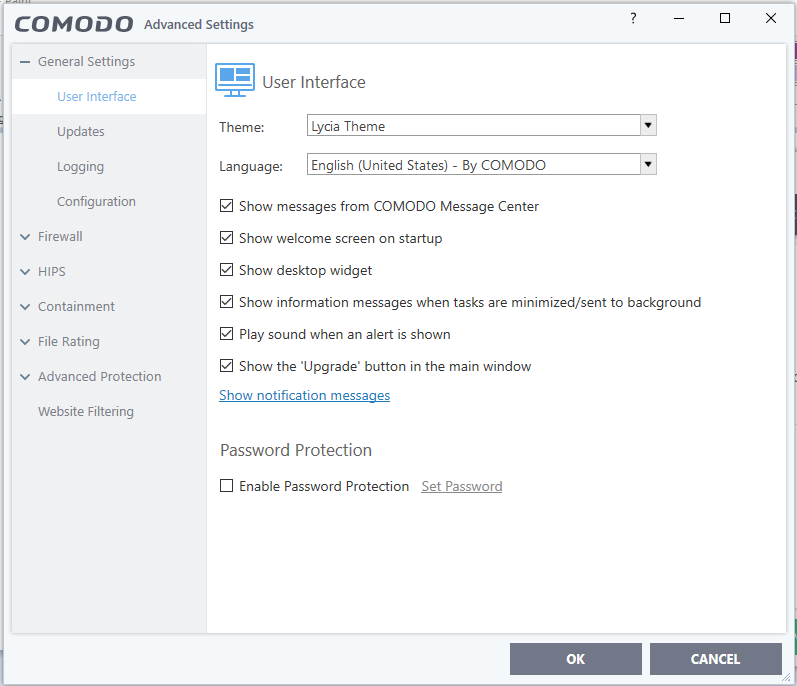
Step 3. Click on ‘Settings’ appearing on top of window then a new window will appear as below.
comodo-firewall-advanced-settings-window

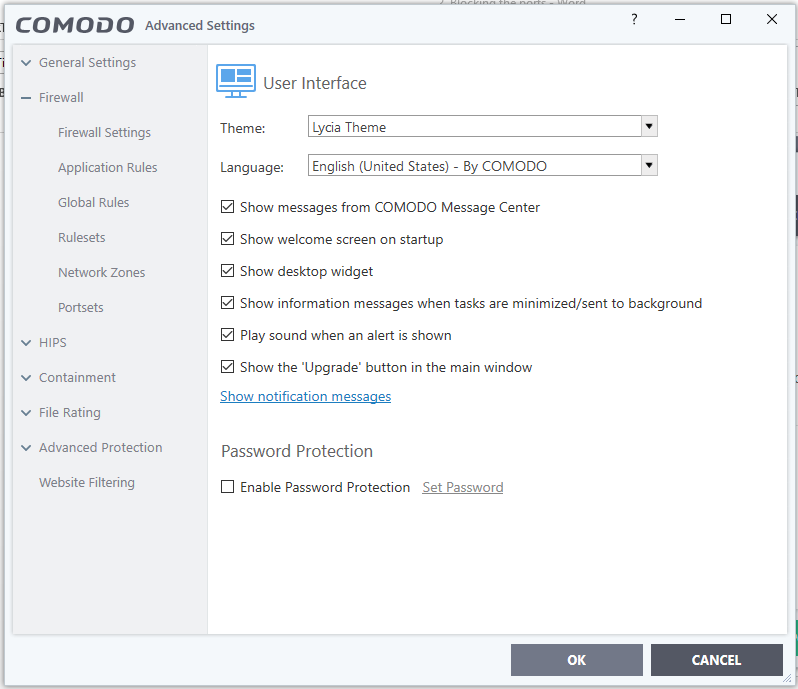
Step 4. This is the main setting window where you can check all the settings of Comodo Firewall. Now moving forward for blocking the ports click on ‘Firewall’, you will find window as below where all subheadings of firewall are open.

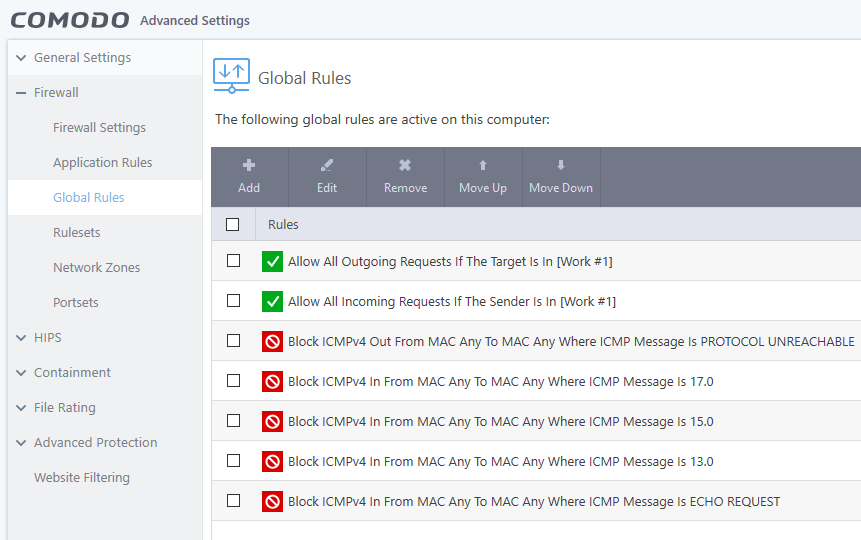
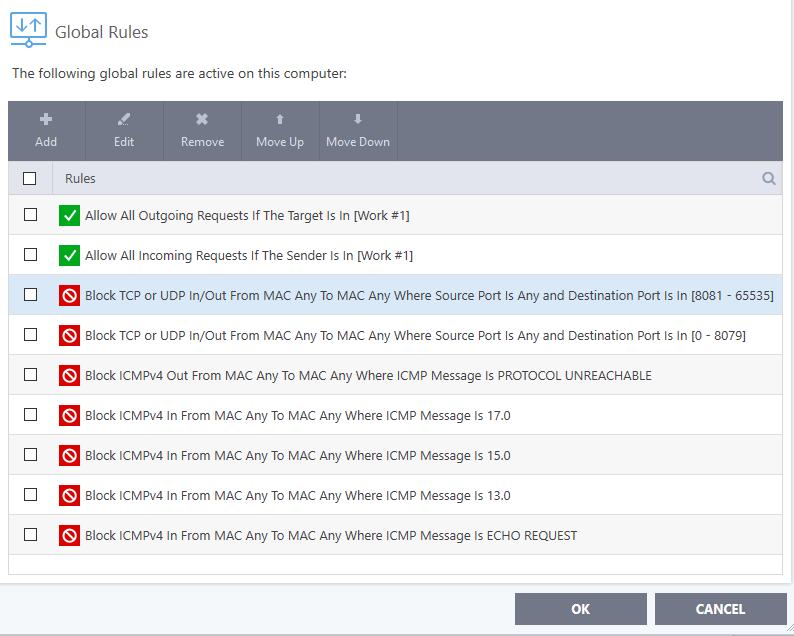
Step 5. Now click on Global Rules, you will see some pre-defined rules by Comodo Firewall with ‘Allow’ and ‘Block’ specification as below window. Firewall use these rules in different scenarios as specified.

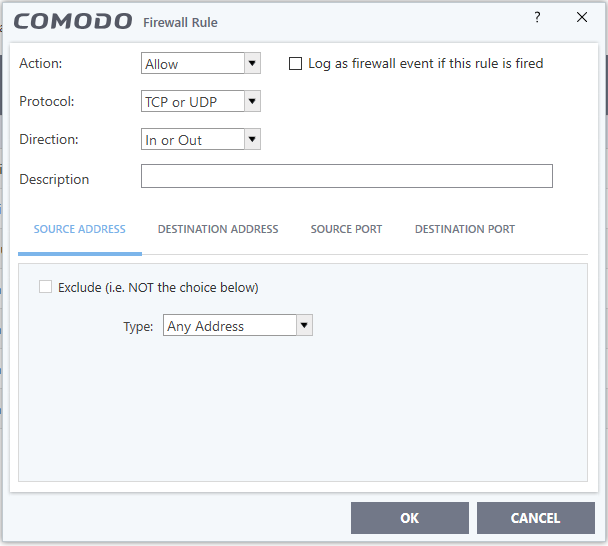
Step 6. We now add a new rule to block the port. For example, if we want to allow only one port i.e. 8080 and block all other ports. Firstly we will click on ‘ADD’ then a window will appear as below.

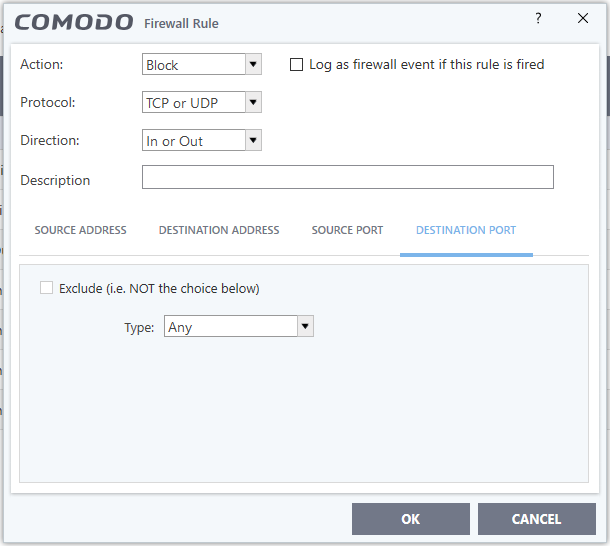
Step 7. Click the drop down list in front of ‘Action’ where we select ‘Block’ and then click on ‘Destination Port’ as below.

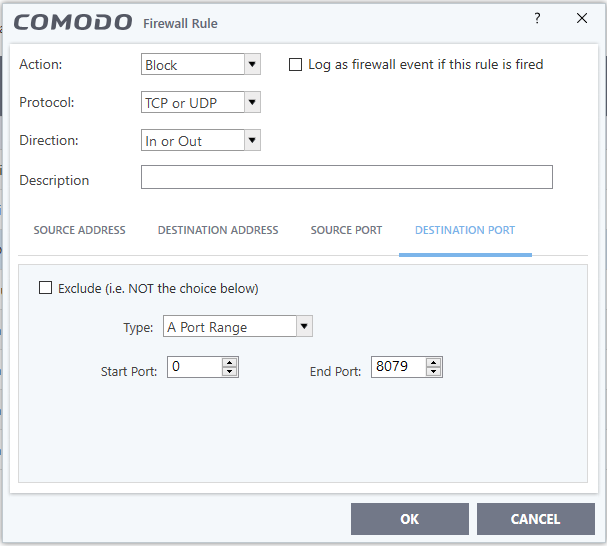
Step 8. Now click the drop down list below where ‘Any’ is displayed and select ‘A Port Range’. Enter the Start Port as ‘0’, End Port as ‘8079’ and click OK. Please refer the image below.


Step 9. A rule will be formed as below.

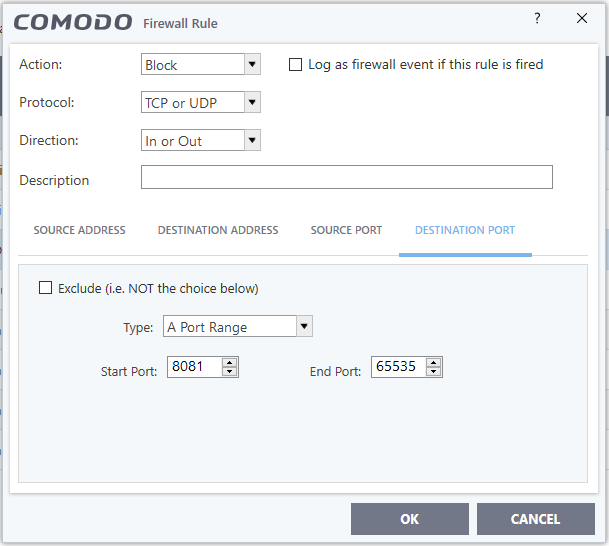
Step 10. Click again on ‘Add’ button as we need another rule. We will just change the port range now and rest of the process will be same as above. Port Range will be Start Port as ‘8081’ and End Port as ‘65535’. Refer the image below.

Step 11. Again a second rule will be formed as below. Press OK down below to save the changes. So now all the ports of your computer are blocked except the ‘8080’ number port.

* The Content stated above is for informational purpose only. Expert Software Team is not responsible if any part of content found meaningless in any manner or condition.
How to install Comodo Firewall in PC

Security of your computer from being hacked through Internet is of utmost important. So if we able to block computer ports then it will inaccessible for any unwanted intruder. Now we going to learn that how we can block all ports though ‘Comodo’ firewall. Here we start with the Installation process of Comodo Firewall.
 
Step 1. Download Comodo firewall setup from https://www.comodo.com/home/internet-security/firewall.php as ‘Free Firewall Download’ as per below screen shot.

 
Step 2. Setup file will be shown as below of size 5.1 Mb as below if you are a Chrome Web Browser User.

 
Step 3. By clicking on the downloaded file a window will appear as below, now click on Run.

 
Step 4. A window asking for next step of installation will be shown as below where you have to click ‘I AGREE’.

 
Step 5. Click ‘Next’ as below screen shot after you specify whether you like Yahoo as your Home Page or not by tick or untick inside the selection box.

 
Step 6. Again click ‘Next’ when below screen appears. [It will be better if we don’t untick any below option]

 
Step 7. Now click ‘Install’ as per below image which will initiate the installation. When the installation completes, it will ask to restart the computer and that we must follow to complete the process.

* The Content stated above is for informational purpose only. Expert Software Team is not responsible if any part of content found meaningless in any manner or condition.
How to do sparse update with Check for modifications

The third method for files not showing under working folder is ‘Check for modifications’. So now we see how to do sparse update with check for modifications as below.

Sparse update with Repo-Browser<< Already gone through this page >>

Step 1. click on your working folder select ‘TortoiseSVN’ and then click on ‘Check for modifications’ as below

 
Step 2. A window as below will appear.

 
Step 3. Now press ‘Shift’ key and while pressing it click on ‘Check repository’ then window will change as below image.

 
Step 4. Now the above window shows that ‘s1’ text file is not checked out which means it is not showing as a working copy in working folder. So to make it working copy right click on the file icon and click on update as below image.

 
Step 5. A new window will appear on the same window as below, click on OK button.

 
Step 6. Now another window will appear as below stating that ‘Update Finished’ which means your update is finished.

 
Sparse update with Repo-Browser<< Already gone through this page >>

* The Content stated above is for informational purpose only. Expert Software Team is not responsible if any part of content found meaningless in any manner or condition.
How to do Sparse Update with Repo-Browser

We can also select the files in working folder with the help of Repo-Browser. So now we learn about ‘How to do sparse update using repo-browser’. Repo-browser is short form for Repository Browser.
Sparse update with Update to Revision<< Already gone through this page >> sparse update with check for modifications

Step 1. Right click on your working folder, drag towards ‘Tortoise SVN’ and then to ‘Repo-browser’ click on it as per screen shot below.

 
Step 2. A new window will display, right click on the file which you want to select, drag the cursor to ‘Update item to Revision’ and click on it.

 
Step 3. Click ok when below displayed image appears. Another window appears which shows that update is finished as per screen shot down below.


Sparse update with Update to Revision<> sparse update with check for modifications

* The Content stated above is for informational purpose only. Expert Software Team is not responsible if any part of content found meaningless in any manner or condition.