Now the Nevino Billing Software is available to work upon. We start with adding the party details and from below lesson we will know about how to add party.
Click Here To Buy Nevino Billing Software
Learn through below video how to add Party in Nevino Billing Software.
How to Login << Already gone through this page >>How to add ledger
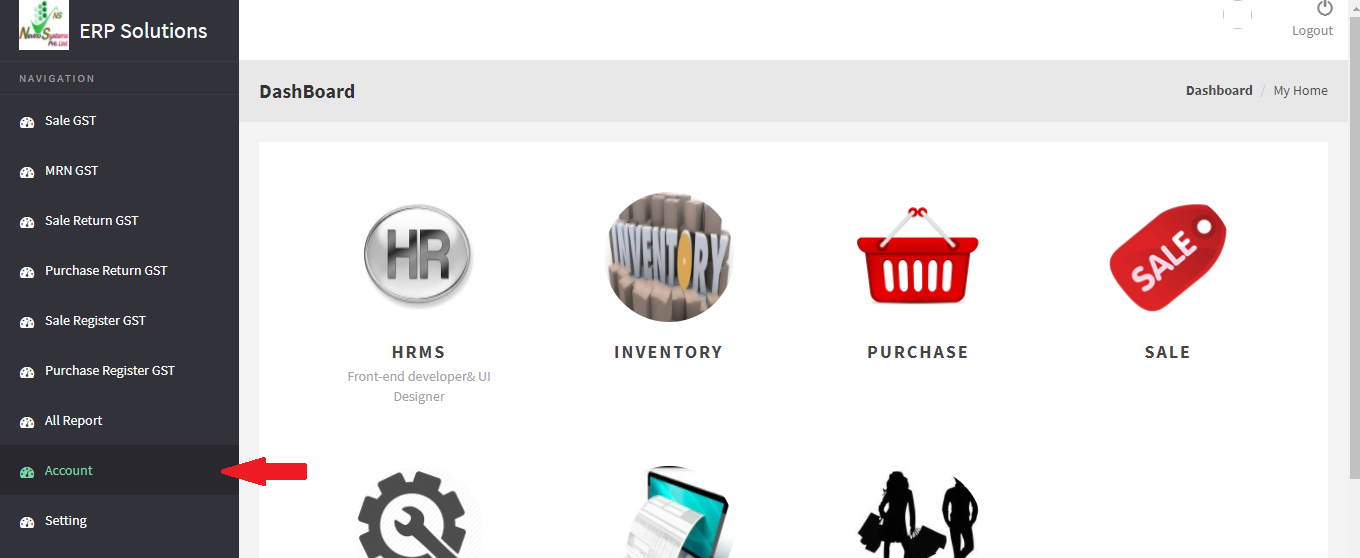
Step 1.When below screen appears click on ‘Account’ option appearing on the left hand side of screen as below screen shot.
Step 2. Now screen will appear as below now. You must have noticed company’s name appearing on top of the window. Click on ‘Add’ button appearing in line with other buttons.

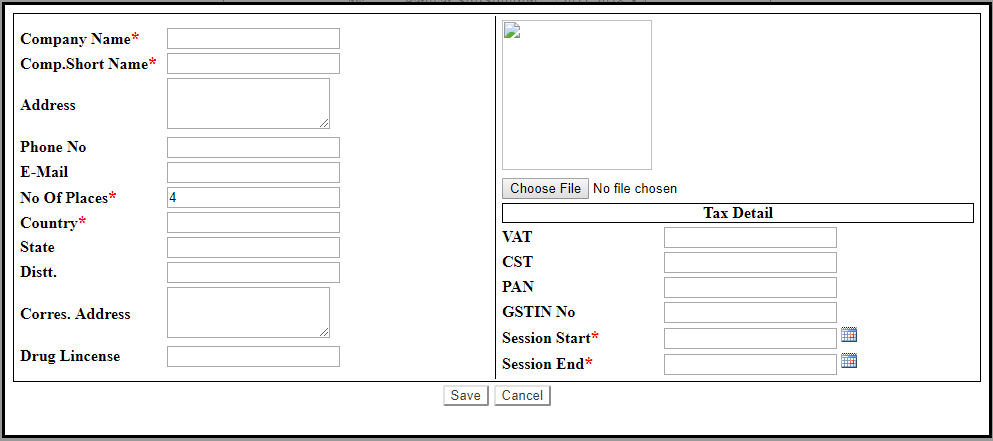
Step 3. When ‘Add’ button is clicked a new window will appear as below where you can add the party details.
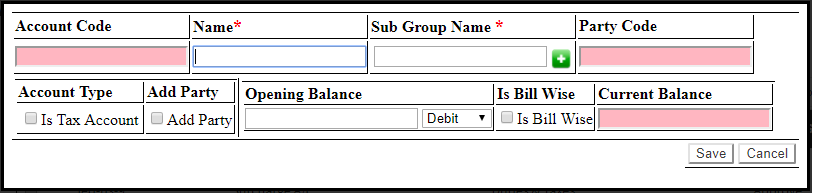
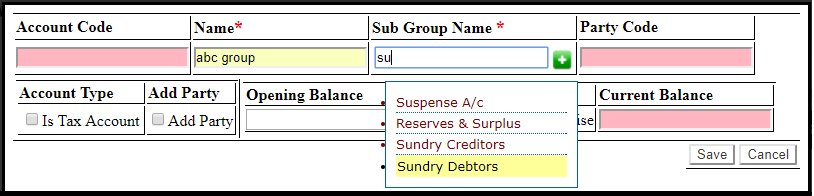
Step 4.Enter the party name and sub group name will be the type of account concerned to that party. For example, party name is ‘abc group’ and sub group name as ‘Sundry Debtors’.
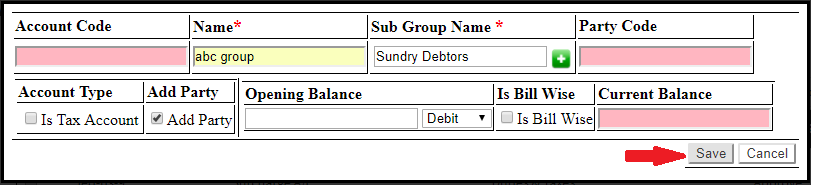
Step 5. Now tick on ‘Add Party’ and click on ‘Save’ button.
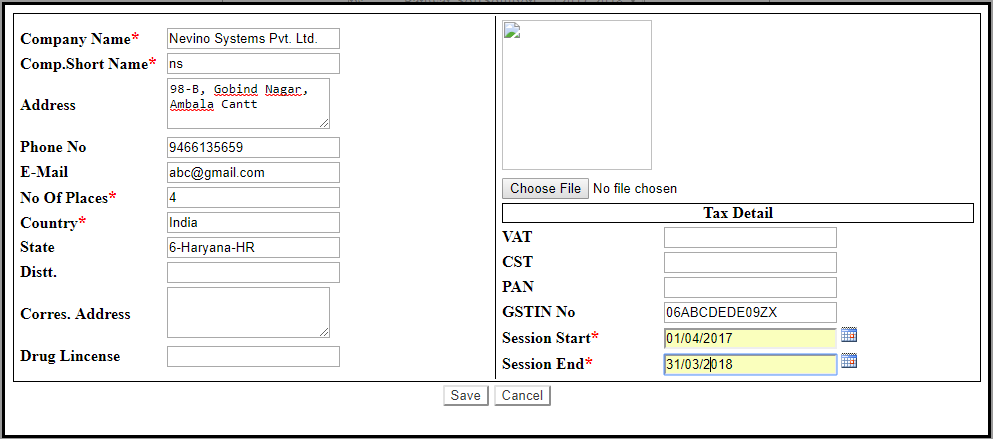
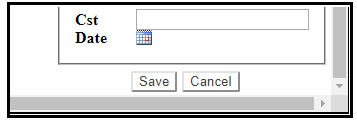
Step 6. When save button is clicked a new window will open where you can add all details related to that party as per the image below.
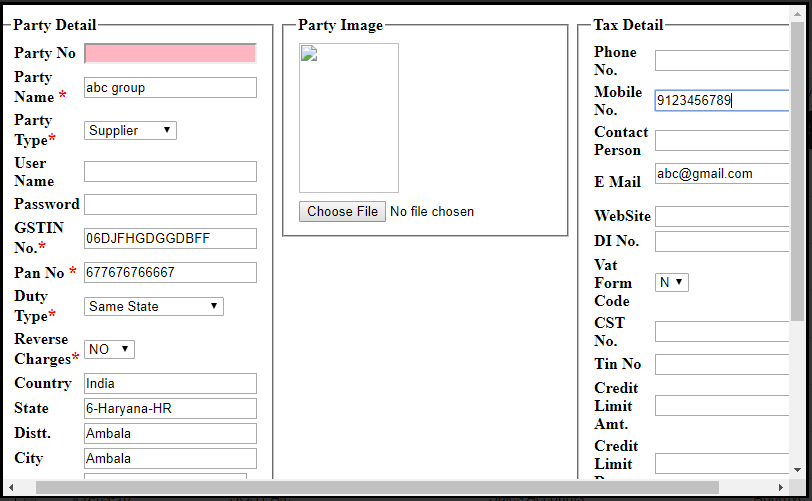
After filling all details click on ‘Save’ button located in lower right corner of the window.
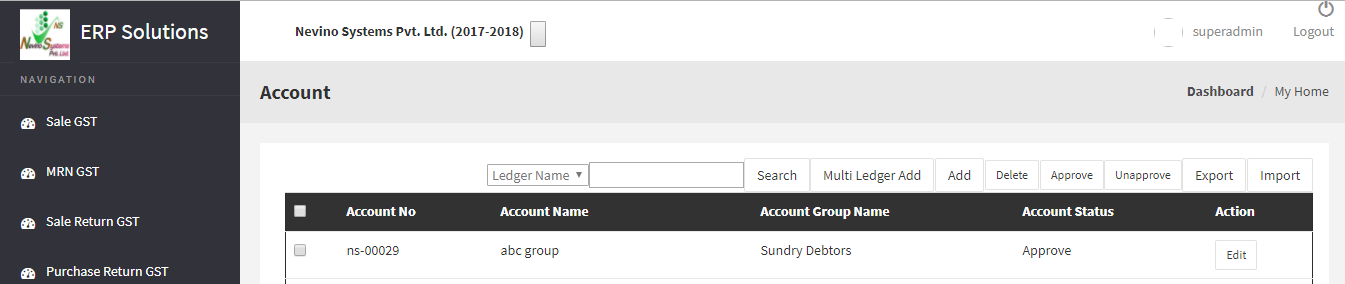
Step 7. Now the details are saved and the party name will be shown as per screen shot below.
Click Here To Buy Nevino Billing Software
Learn through below video how to add Party in Nevino Billing Software.
* The Content stated above is for informational purpose only. Expert Software Team is not responsible if any part of content found meaningless in any manner or condition.