Category: HR
-
Never use Old Battery in Smartphone
Never use Old Battery in Smartphone. Yes, if you are a Smartphone user then never have an old battery in your phone, instead always use the new battery when your battery gets older. Here are some reasons behind it which were unknown before. Old batteries of Smartphone get heats up quickly as soon as you…
-
Why Employees not getting good appraisals?
There are number of reasons why employees not getting good appraisals and here are few which we have find out as per below. Performance evaluations not done in real time instead they taken place annually which is not a correct way of identifying and resolving the performance issues. Managers check the performance on personal commitment,…
-
Managers mistakes that force Employees to quit!
It is true that Employees quit jobs not because of personal reasons but due to their Mangers mismanagement or mistakes. Managers intentionally or unintentionally make mistakes that force their employee to leave the organization. Some big mistakes we found are as follows. Managers overburden employees with work assignments on daily basis that make employees feel…
-
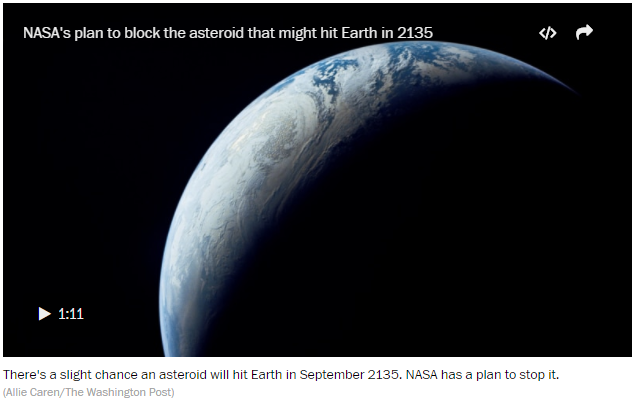
An asteroid can hit the Earth in year September 2135
As per NASA an American Space Agency has discovered that an asteroid can hit the Earth in September of year 2135. The name given to asteroid is ‘Bennu’ and its size is equivalent to the size of Empire State Building of USA. The scientists are planning to use nine-ton “bulk impactor” to push it out…
-
HR Software – Terms and Conditions
TERMS OF USE:- By downloading, browsing, accessing or using HR Software application (“Software Application”), you agree to be bound by these Terms and Conditions of Use. We reserve the right to amend these terms and conditions at any time. If you disagree with any of these Terms and Conditions of Use, you must immediately discontinue…
-
Introduction of Nevino HR Software
Nevino Human Resources Software: Human Resources is the backbone of every organization. So, it becomes necessary to use human resources perfectly. To achieve this goal Nevino HR software is equipped with complete solution for all types of organizations. This software is developed by Nevino Systems Private Limited situated in Ambala(Haryana). The basic features of Nevino HR…
-
How to edit Employee in Nevino HR Software
After saving the employee details in nevino hr software it is possible to edit details of employee in an easy way. In this blog we will learn how we can edit the employee details in nevino hr software. Step 1.On the main window of Nevino HR Software click on ‘HR’ icon as indicated in image…
-
How to add Employee in Nevino HR Software
Employee is the major part of an organization whose information is very important. In Nevino HR Software adding an employee is very user friendly. So please follow below mentioned steps to know how we can add employee in nevino hr software. Step 1. We will start from the main screen of Nevino HR Software where…
-
How to add Band type leave in Nevino HR Software
Nevino HR Software is equipped with functionality to assign different type of leave to every band type particularly. So, in this blog we will learn how we can add band type leave in Nevino Hr Software. Step 1. Let’s start from the main window of Nevino HR Software where you must click on ‘HR’ Icon as…
-
How to edit Bands in Nevino HR Software
Whenever there is change in bands inside organization then it is very easy to change bands name in Nevino Hr Software. So, lets learn how we can edit the bands in Nevino Hr Software. Step 1.We start from the main window of Nevino HR Software where you must click on ‘HR’ icon as shown below. Step…