There is a requirement in accounts of giving category names to every item. So now we learn how we can add category name in Nevino Billing Software.
Click Here To Buy Nevino Billing Software
Learn through below video how to add category name in Nevino Billing Software.
How to add ledger << Already gone through this page >>How to add UOM
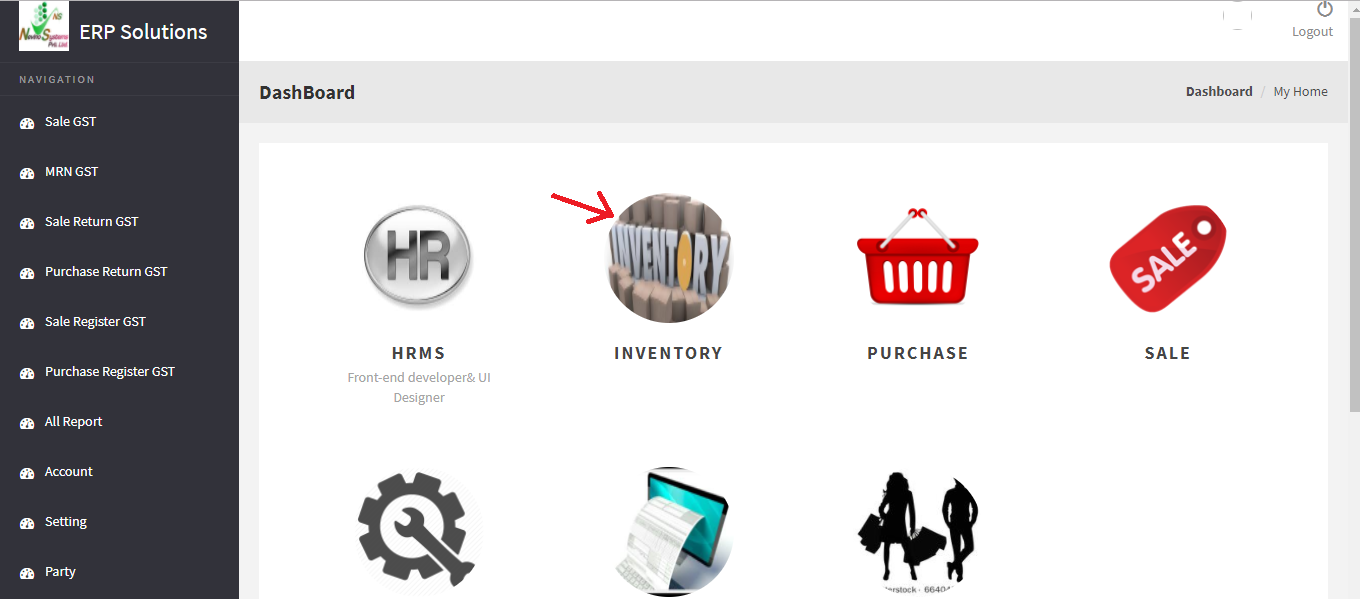
Step 1. On the main window of Nevino Billing Software click on ‘Inventory’ as below screen shot.
Step 2. After clicking on ‘Inventory’ screen as below will appear,now click on ‘Add’ button.
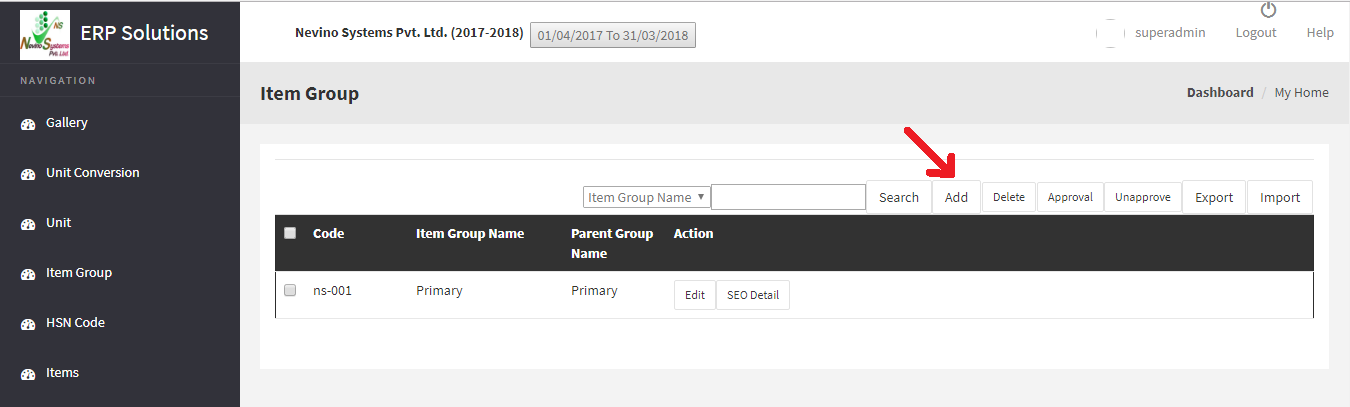
Step 3. When ‘Add’ button as mentioned above clicked screen as below will appear

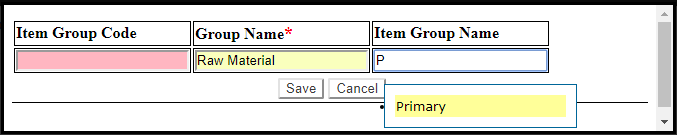
Step 4.Leave the first column ‘Item Group Code’ blank as it picks code automatically. Enter the name of group for example ‘Raw Material’ under ‘Group Name’ as per screen shot below.

Step 5. Now in next column ‘Item Group Name’ enter ‘Primary’. When you enter ‘P’ primary will be shown automatically as below screen shot then press enter. ‘Primary’ will be shown.
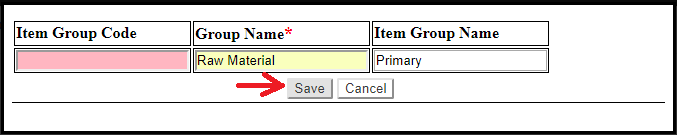
Step 6. When all required columns filled click on ‘Save’ button below.
Step 7. When ‘Save’ button clicked screen as below will appear.

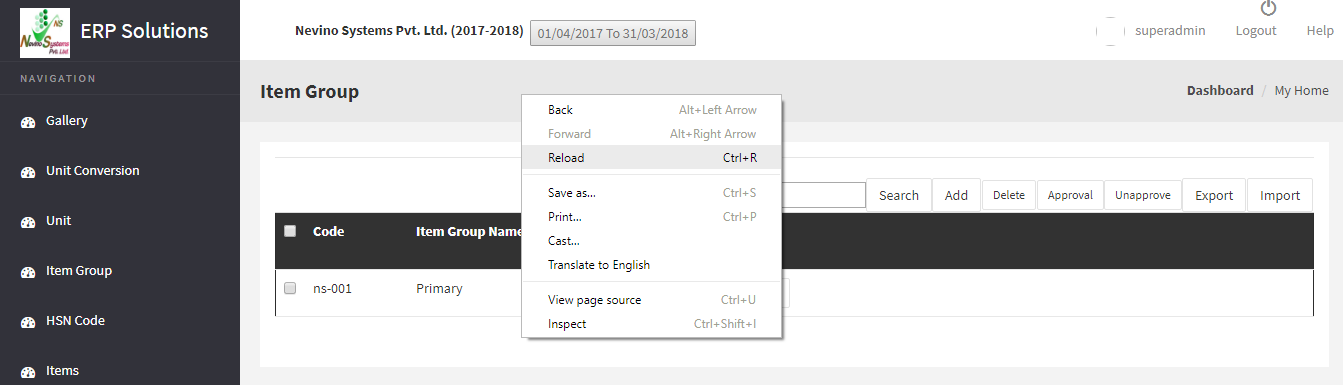
Step 8. Now press Function Key ‘F5’ to refresh the page. In case function key not working then right click on the screen in blank space, drag the cursor to ‘Reload’ and click on it or you can press ‘Ctrl+R’ key as per screen shot below.
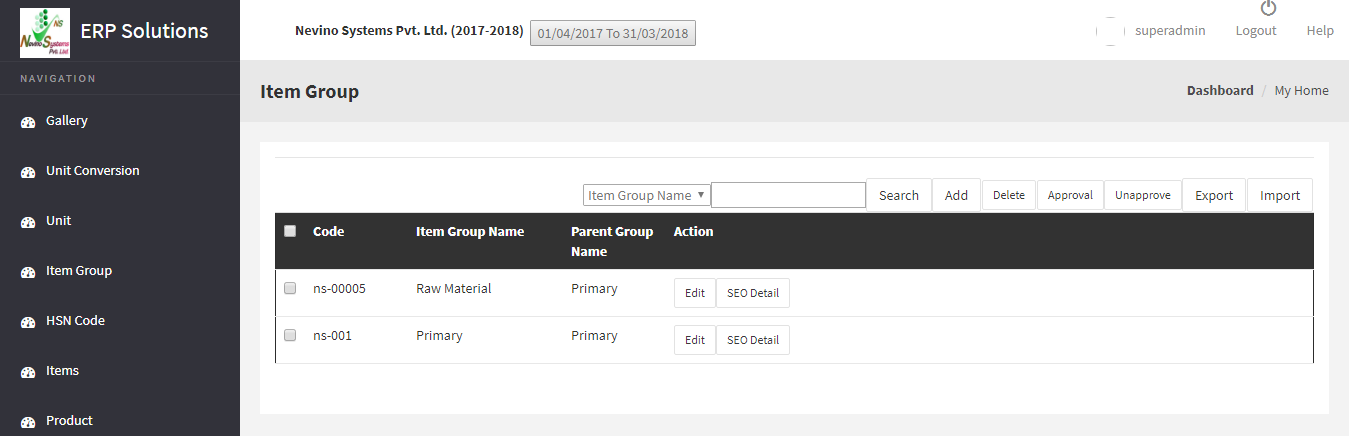
Step 9. When the page is refreshed as per above process you will find ‘Raw material’ as your ‘Category Name’ under ‘Item Group Name’ as shown in screen shot below.
Click Here To Buy Nevino Billing Software
Learn through below video how to add category name in Nevino Billing Software.
* The Content stated above is for informational purpose only. Expert Software Team is not responsible if any part of content found meaningless in any manner or condition.