How to edit Designation in Nevino HR Software

Whenever there is need of making change in designation name in organization by following the below steps you can change designation name. Below steps will guide you how to edit designation in Nevino Hr Software.

Step 1. When you have arrived at main window of Nevino HR Software click on ‘HR’ icon as shown below.
main hr window

Step 2. When window as below appears click on ‘Designation’ as shown in screenshot.
hr designation option

Step 3. When Designation window appears click on ‘Edit’ button as indicated in image below.
hr designation window

Step 4. On click of ‘Edit’ button a window as below will appear where you can see yours saved designation name, now you can click on that box and enter required designation name.
hr designation main window

Step 5. When you have entered the required designation click on ‘Update’ button as shown in image below. On click of ‘Update’ button designation name will be saved.
deasignation hr update

* The Content stated above is for informational purpose only. Expert Software Team is not responsible if any part of content found meaningless in any manner or condition.

How to create Designation in Nevino HR Software

Designation of an employee is very important part of an organization as it relates to the employee. In this blog we will learn that how we can create designation in Nevino Hr Software.

Step 1. When you have login to the Nevino HR Software the window as below will appear.
main hr window

Step 2. Click on ‘HR’ icon as indicated in below screen shot.
hr icon

Step 3. When the ‘HR’ icon is clicked a new window will appear as below where you must click on ‘Designation’ as indicated below.
hr designation option

Step 4. This is the ‘Designation’ window of Nevino HR software. Now click on ‘Add’ button as indicated in below image.
hr add designation

Step 5. On click of ‘Add’ button a new window will appear as shown in below image.
hr enter name

Step 6. Enter name of any designation in the blank box provided with ‘Name’ for example we will add ‘Manager’ as designation name as per below image.
hr name entered

Step 7. When you have entered the designation click on ‘Save’ button as indicated below.
hr designation save button

Step 8. When ‘Save’ button is clicked designation will be saved and that designation name will appear on ‘Designation’ window as shown below. In this way you can add ‘Designation’ into the Nevino HR Software.
hr designation created

* The Content stated above is for informational purpose only. Expert Software Team is not responsible if any part of content found meaningless in any manner or condition.

How to Login in Nevino HR Software

From this blog we will start learning about the Nevino HR Software. First we will understand that how we can login to Nevino HR Software. So please follow below mentioned steps to login.

Step 1. When Nevino HR Software is installed by our technical team on your computer system you will find a window as below on your computer screen.
hr login window

Step 2. In the first box enter the ‘Company ID’ as indicated in the window below.
hr enter company id

Step 3. In the second box enter the username provided by our technical team as indicated in image below.
hr enter username

Step 4. In the third box enter the password as indicated in the image below.
hr enter password

Step 5. Now click on ‘Login’ button and this will complete the login process as per image below.
hr click login button

Step 6. After this you will be login to Nevino HR Software and main window of this software will appear as below screen shot.
hr main window

* The Content stated above is for informational purpose only. Expert Software Team is not responsible if any part of content found meaningless in any manner or condition.

How to add new test category in Nevino Lab Software

Now we will learn about adding new tests under the test category. This information is useful in case whenever any new test is introduced in medical facility. So we will go through how we can add new test under test category in nevino lab software.

Click Here To Buy Nevino Lab Software

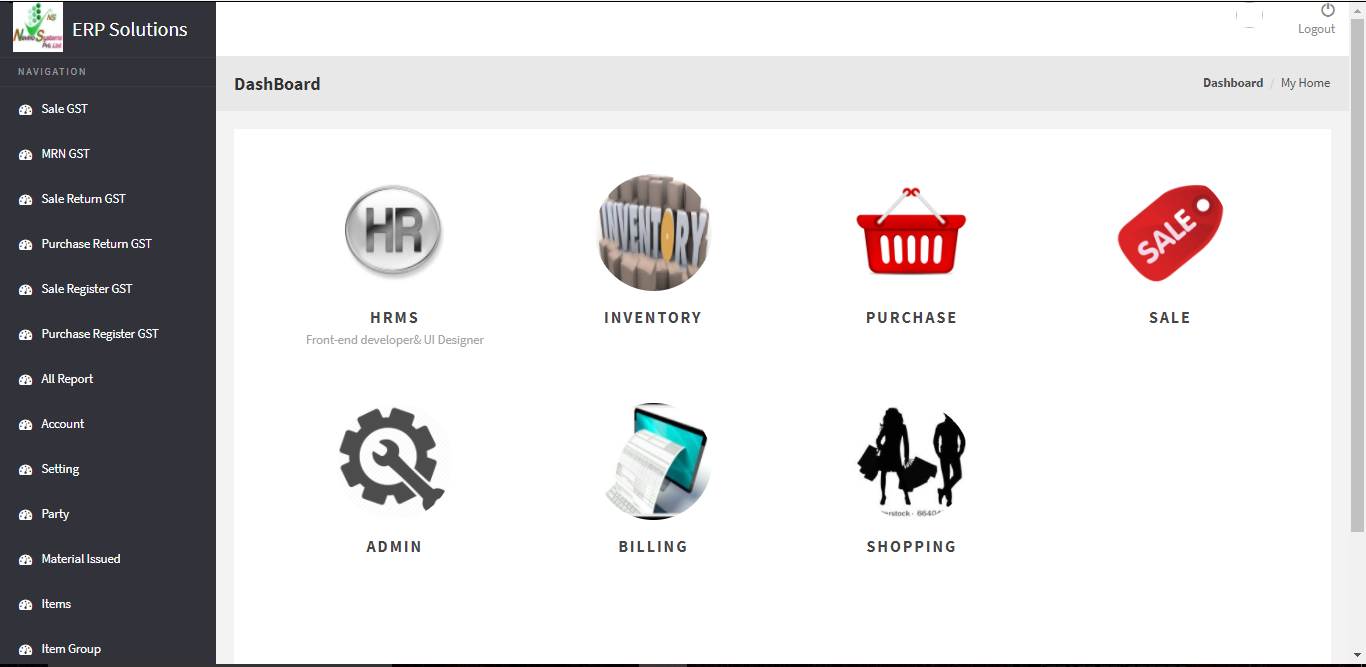
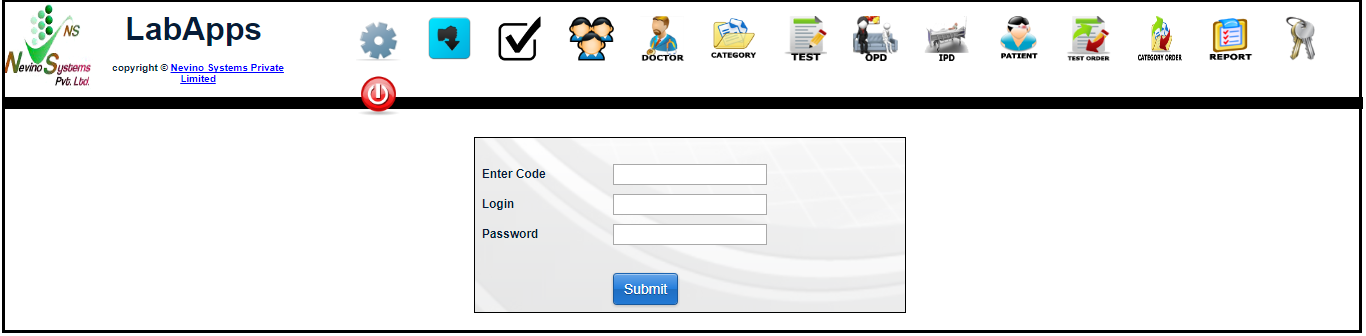
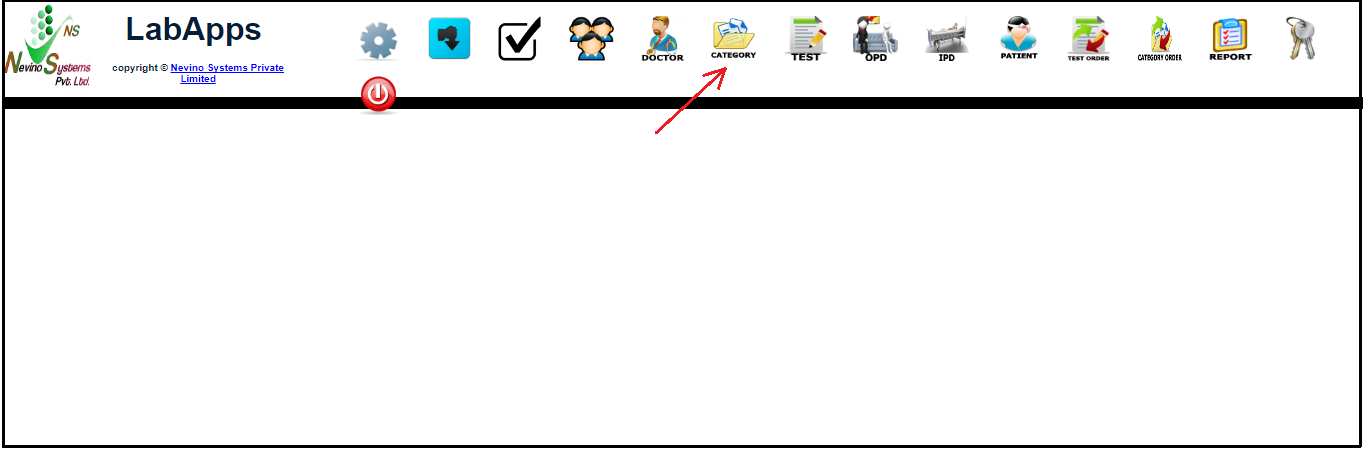
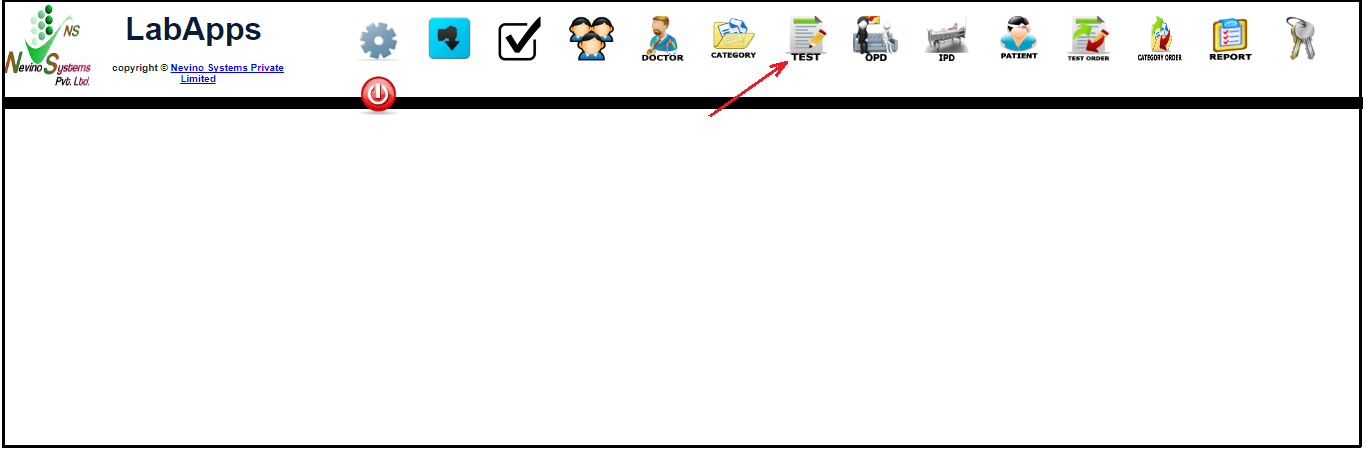
Step 1. On the main window of Nevino Lab Software click on ‘Test’ as shown in nevino lab software.
lab main dashboard

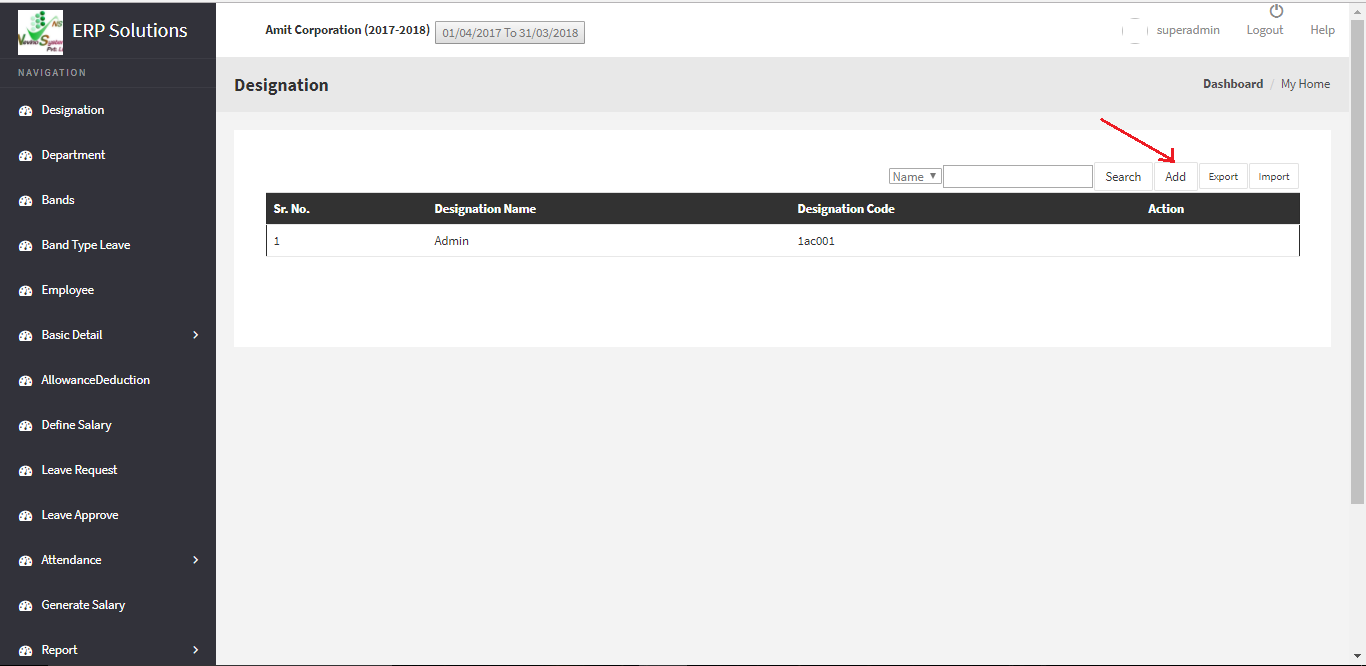
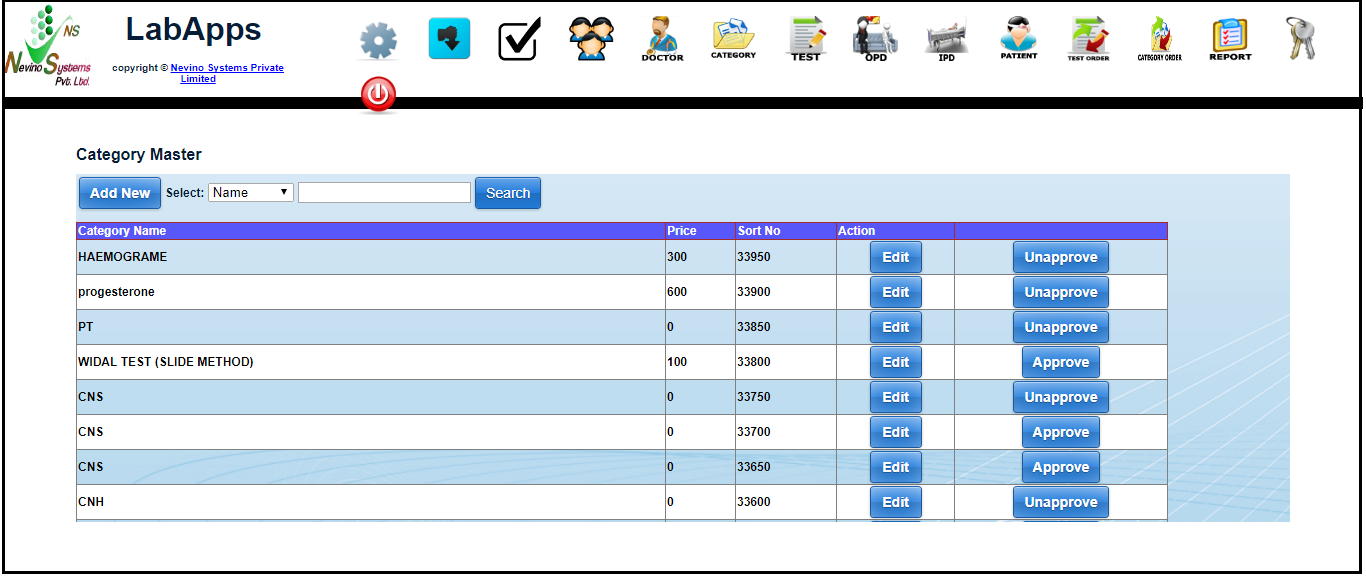
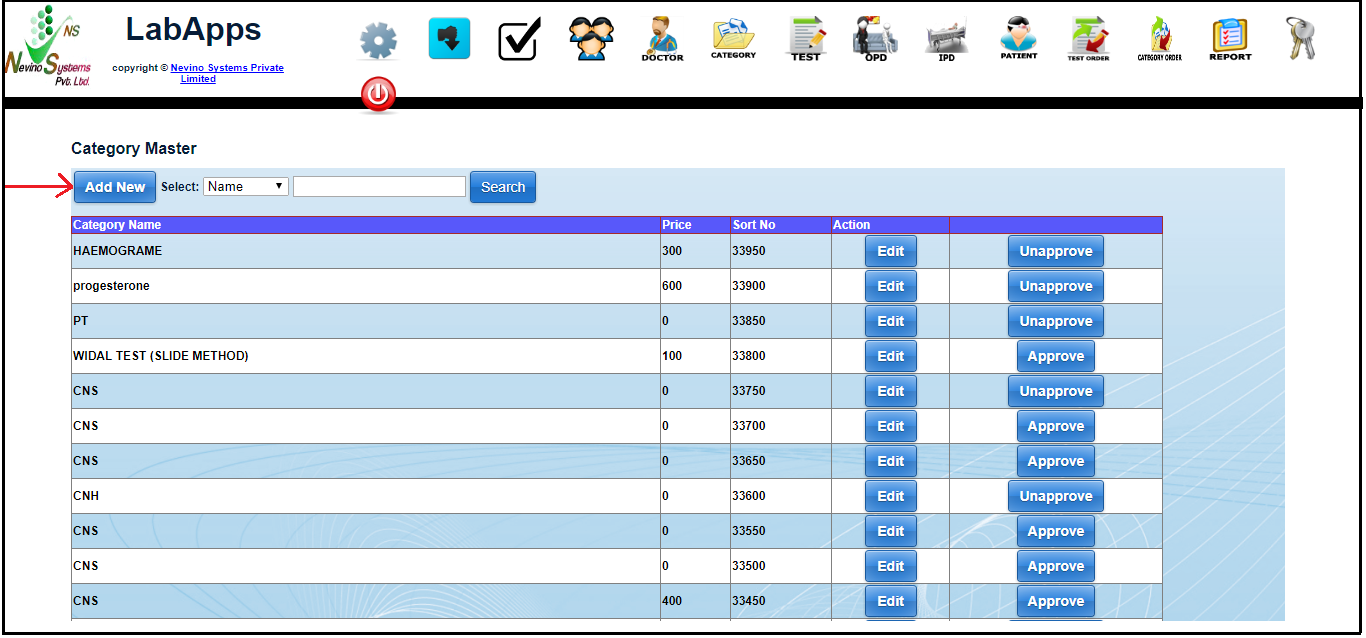
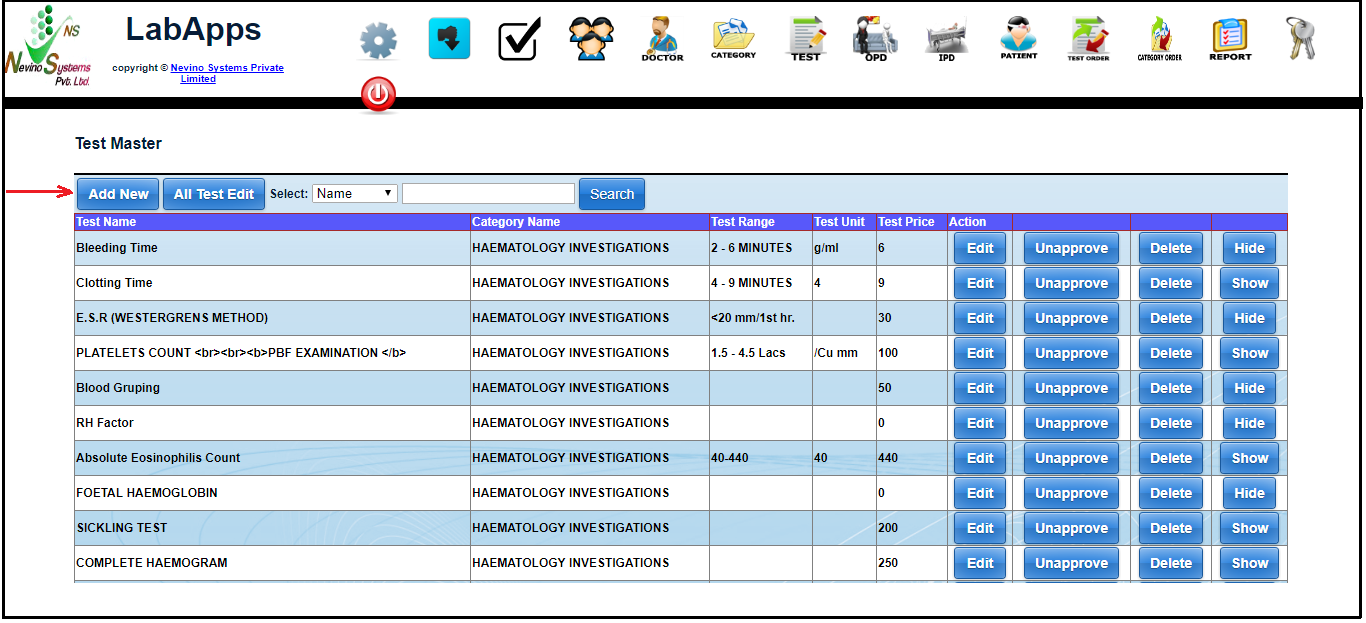
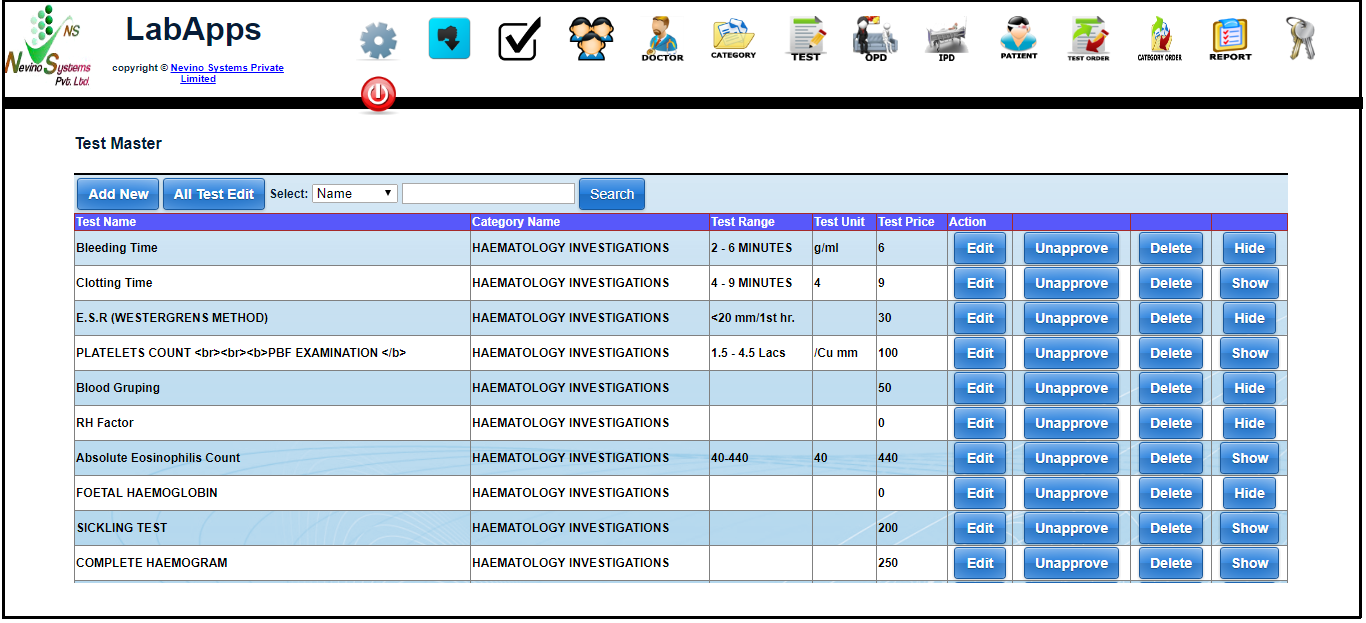
Step 2. A new window will open of ‘Test Master’ as per below image.
add text window

Step 3. Now click on ‘Add New’ button to create new test as shown in below image.
test window add button

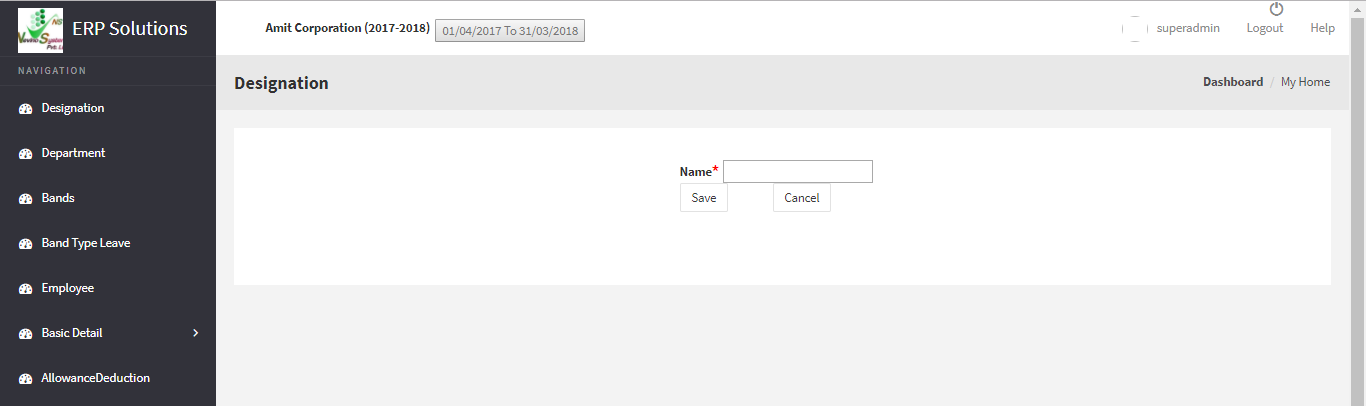
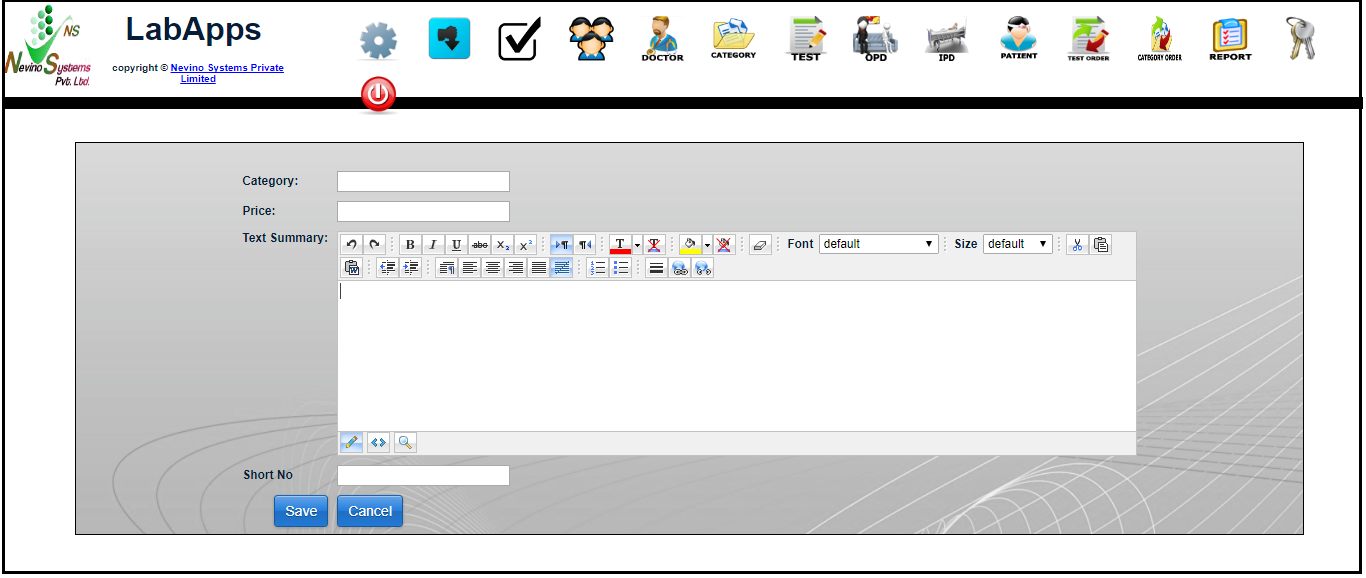
Step 4. On click of ‘Add New’ button a new window will open as shown in below image.
test window

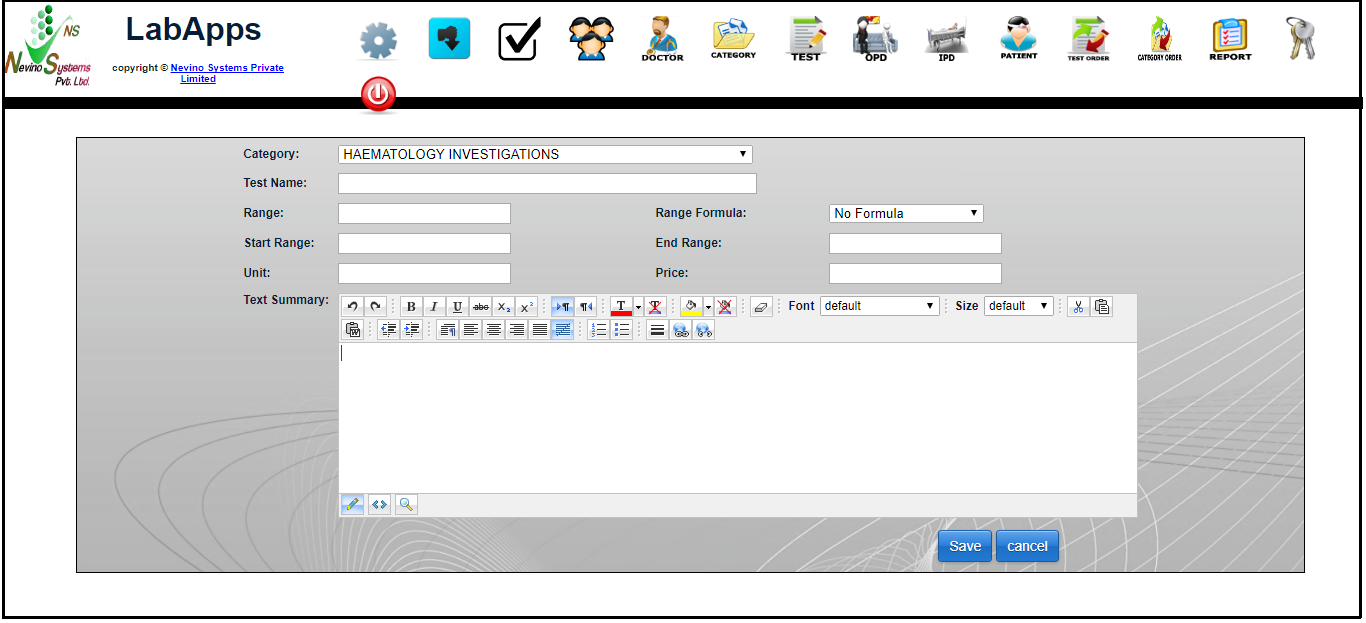
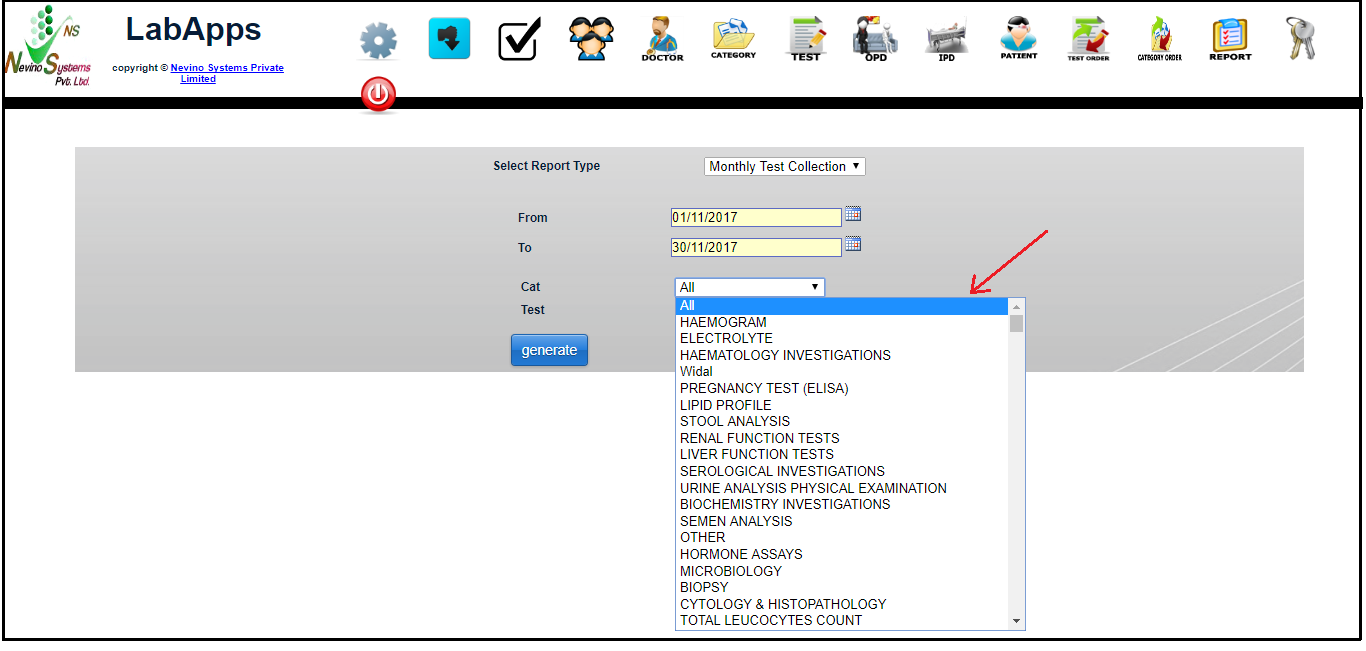
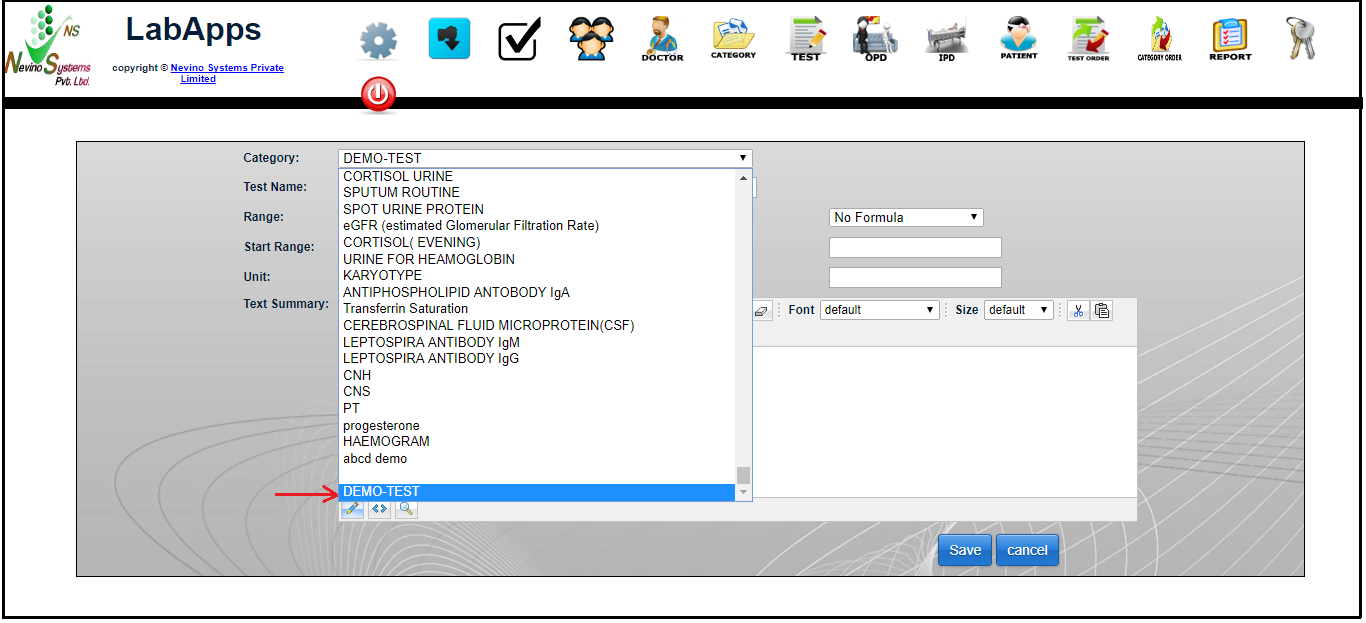
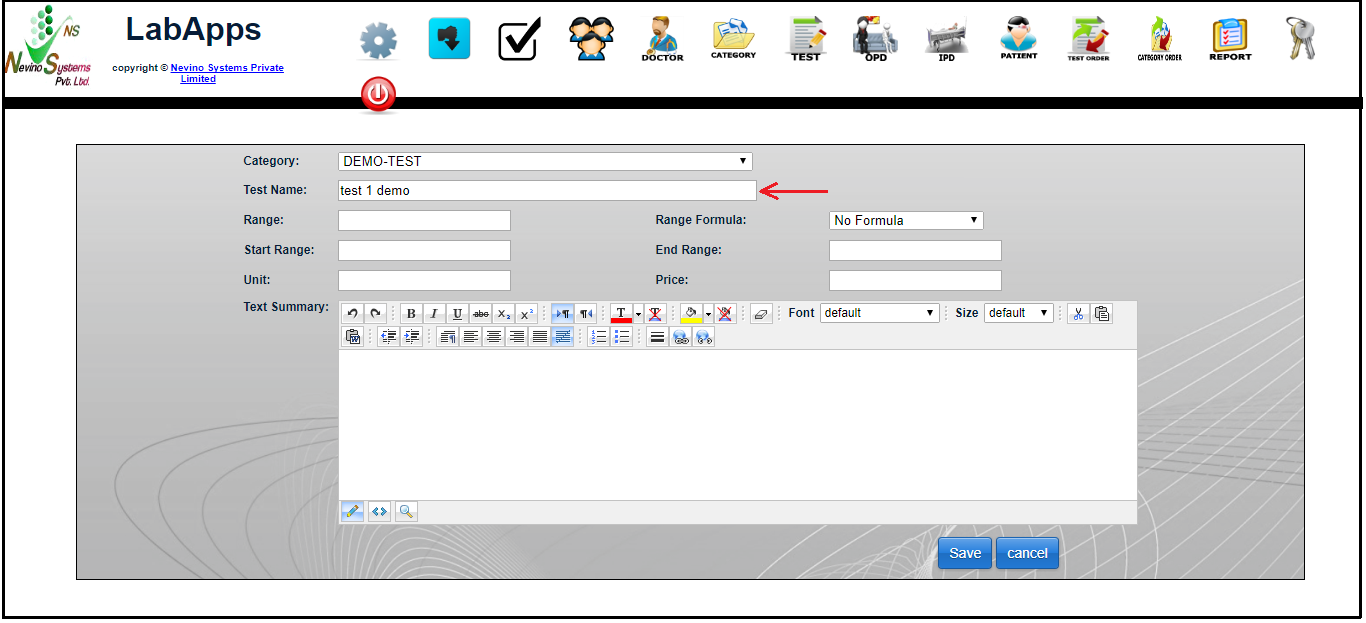
Step 5. Now we will select the test category by clicking on drop down list box as per below image.

select test category
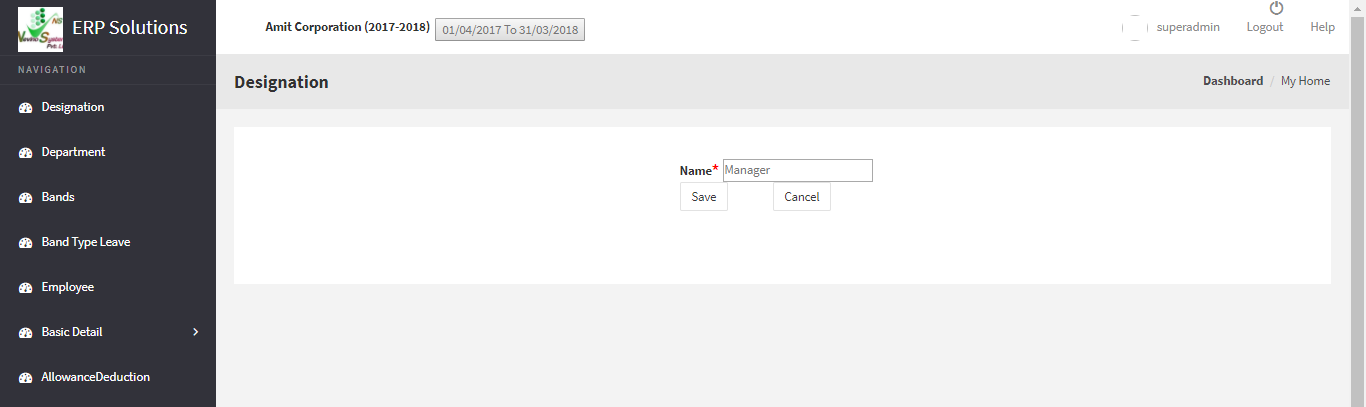
Step 6. Next we will enter the test name which we want to add, for example we will ‘test 1 demo’ as shown below.
enter test name

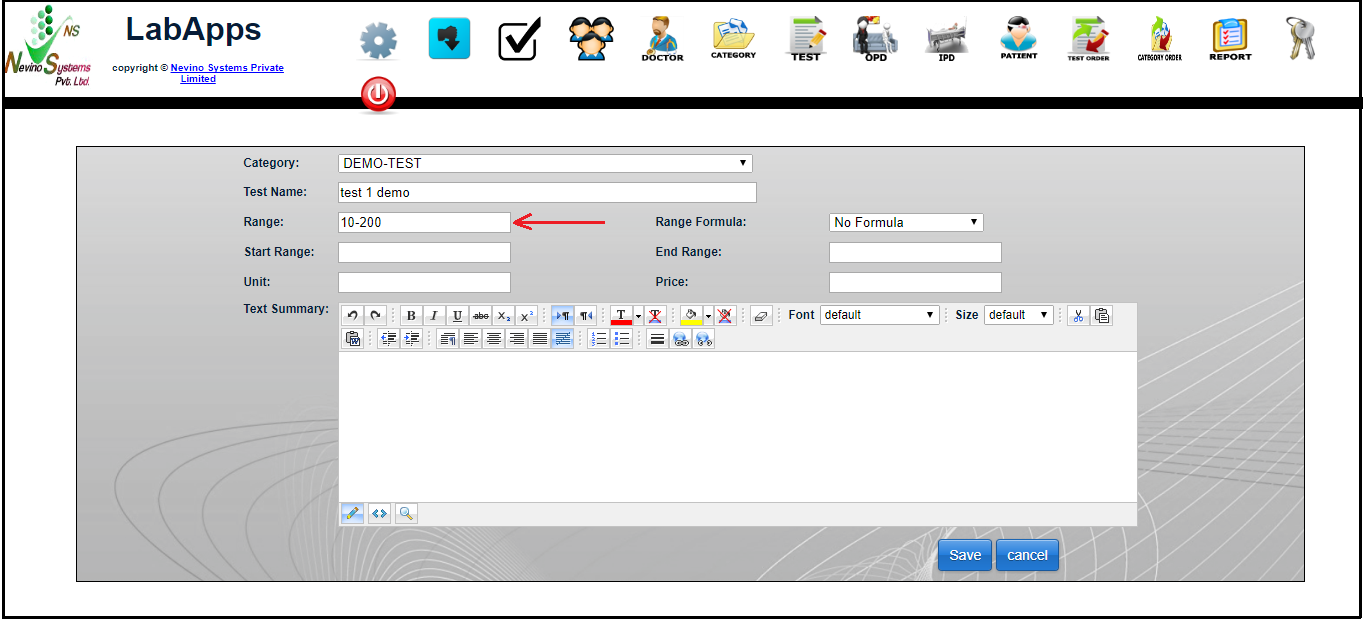
Step 7. In next box enter the range for example we will add ‘10-200’ as shown in below image.
enter test range

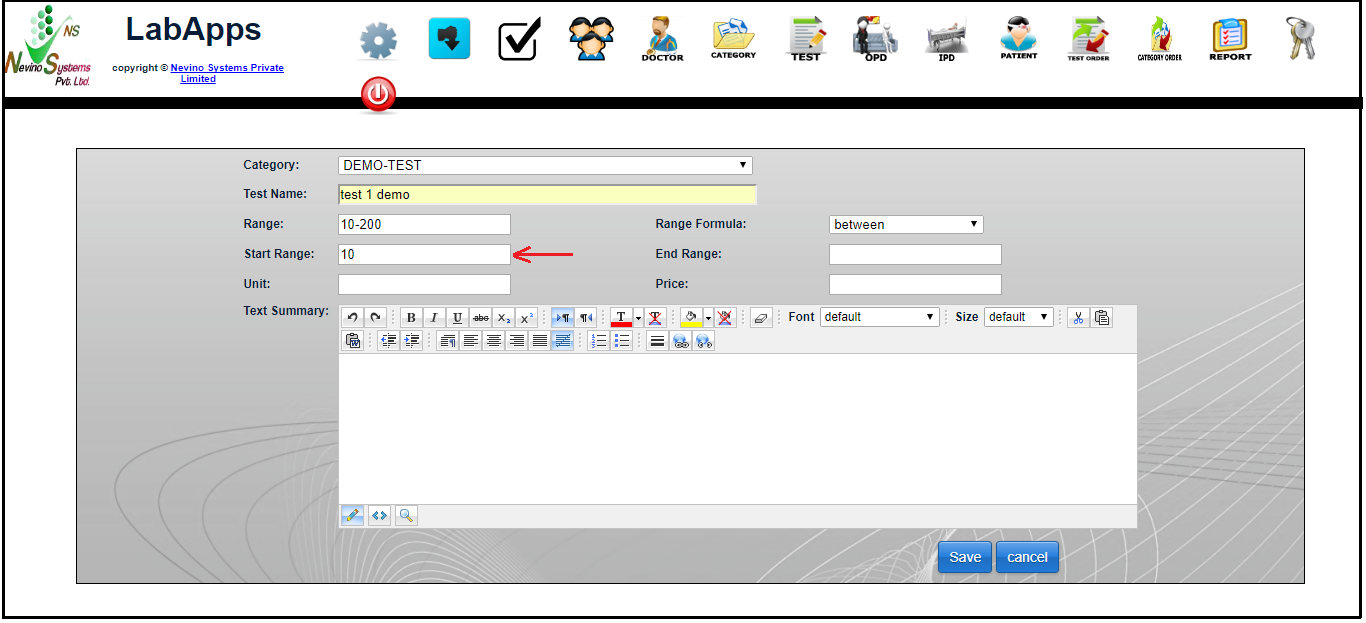
Step 8. Now select the ‘Range Formula’ by clicking on drop down box in front of it and there we will select ‘between’ as shown in image below.

enter test range formula
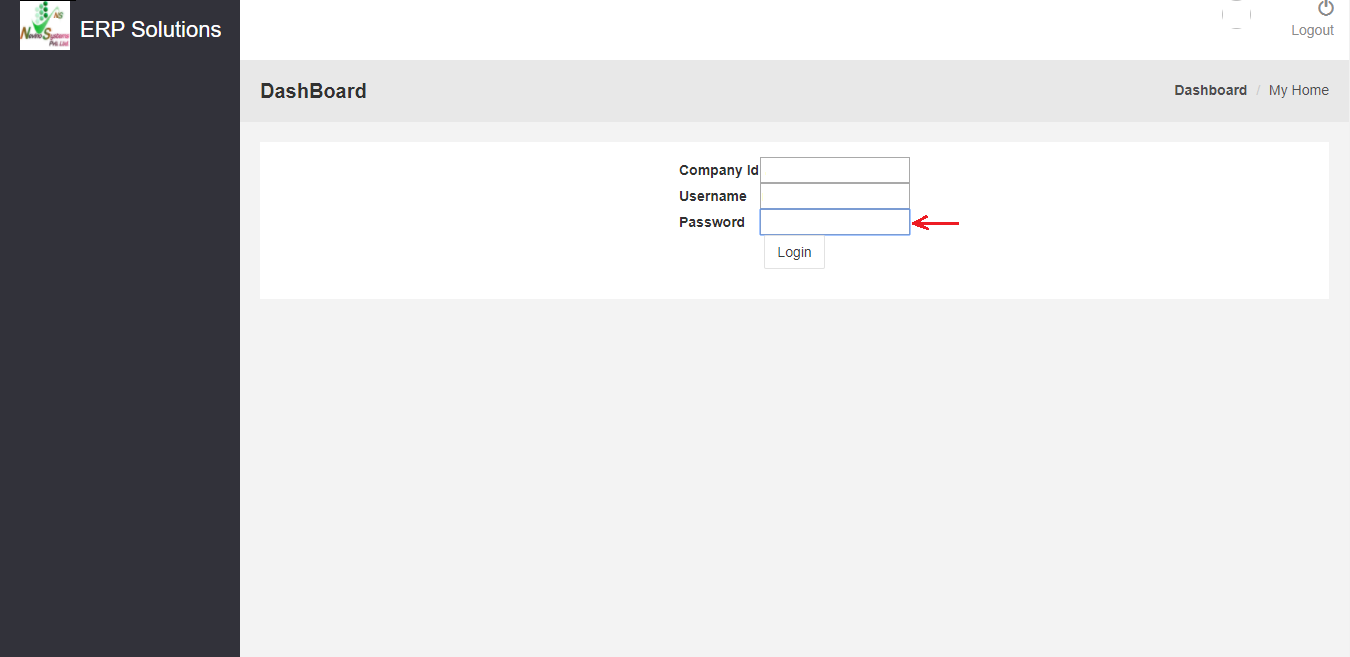
Step 9. In next box enter the ‘Start Range’ where we will enter for example ‘10’ as shown in image below.

enter start test range
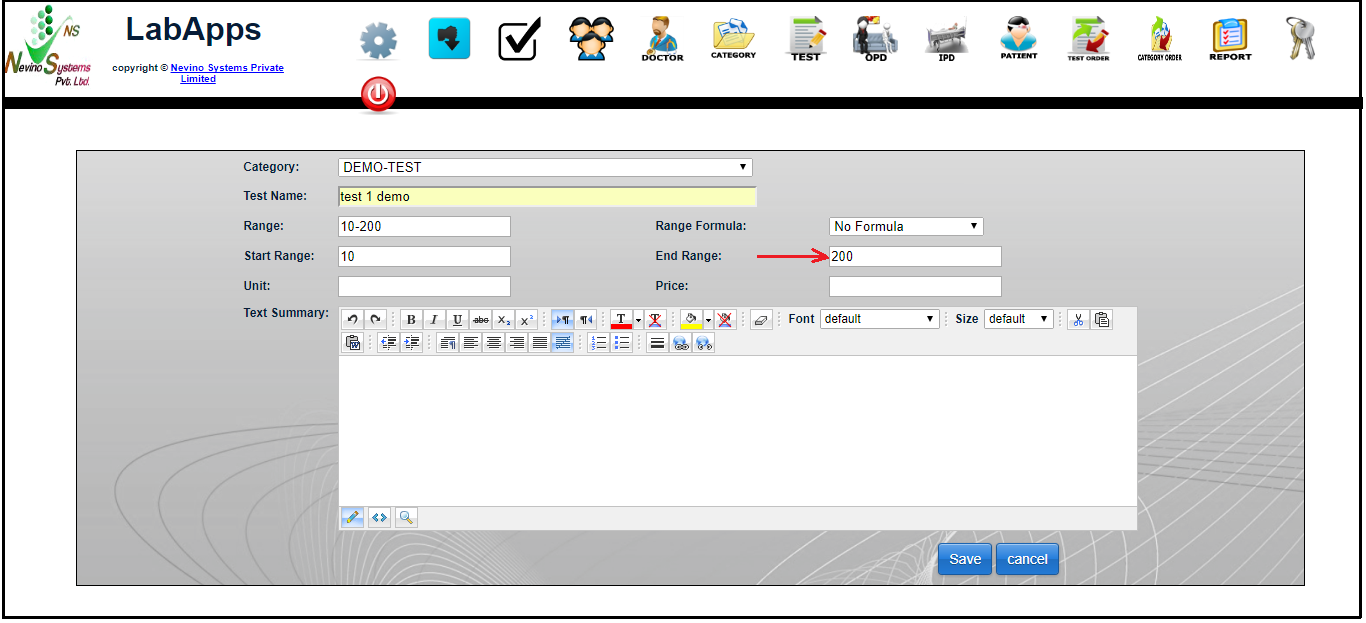
Step 10. Now in the ‘End Range’ box enter the end range as ‘200’ as shown below.
enter end test range

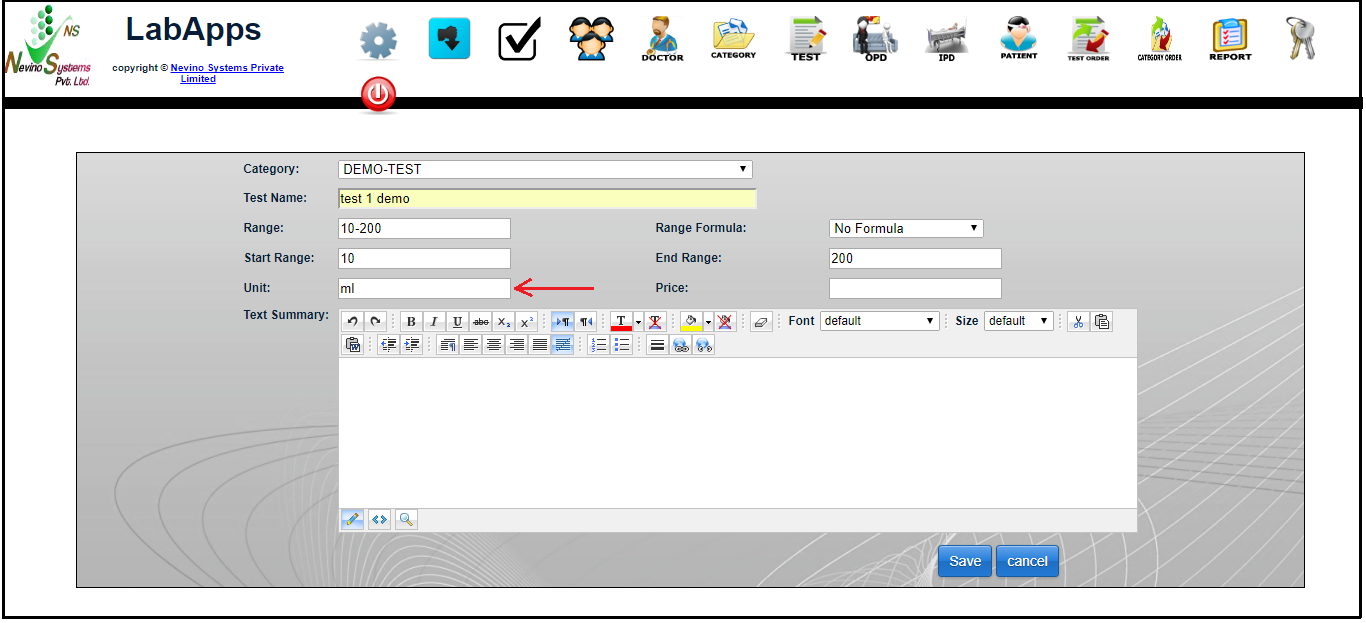
Step 11. In the ‘Unit’ box we will enter the unit for example as ‘ml’ as shown in image below.
enter test unit

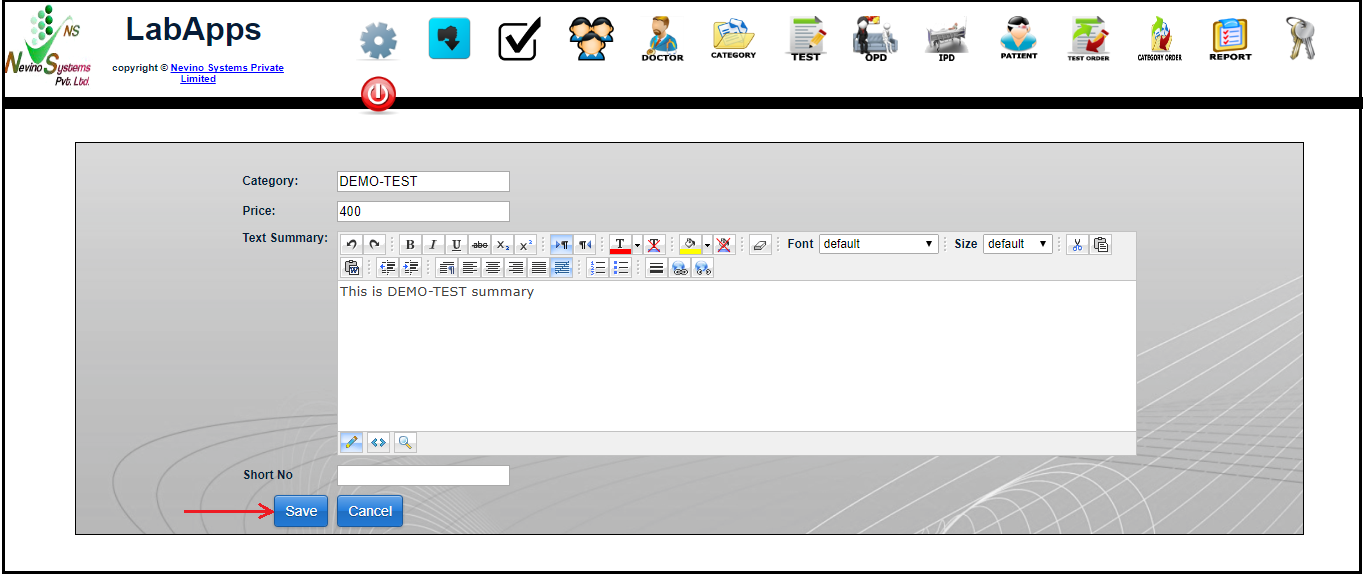
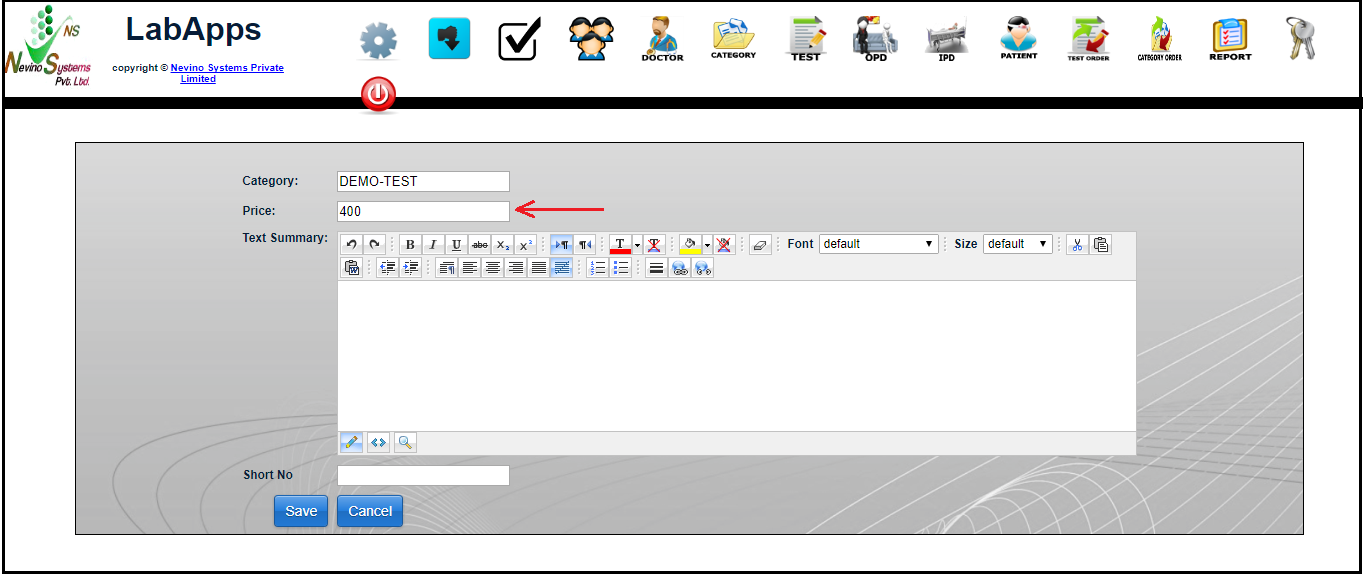
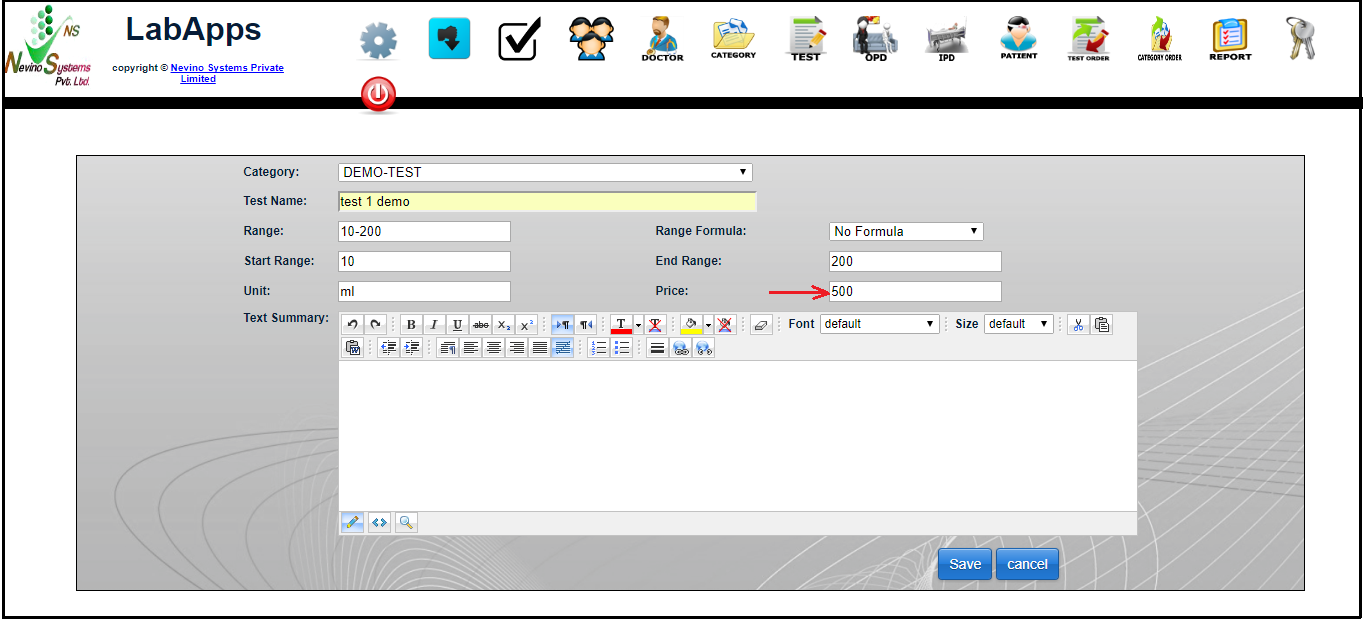
Step 12. The next box is for ‘Price’ so for example we will enter the price of test as ‘500’ as per below image.
enter test price

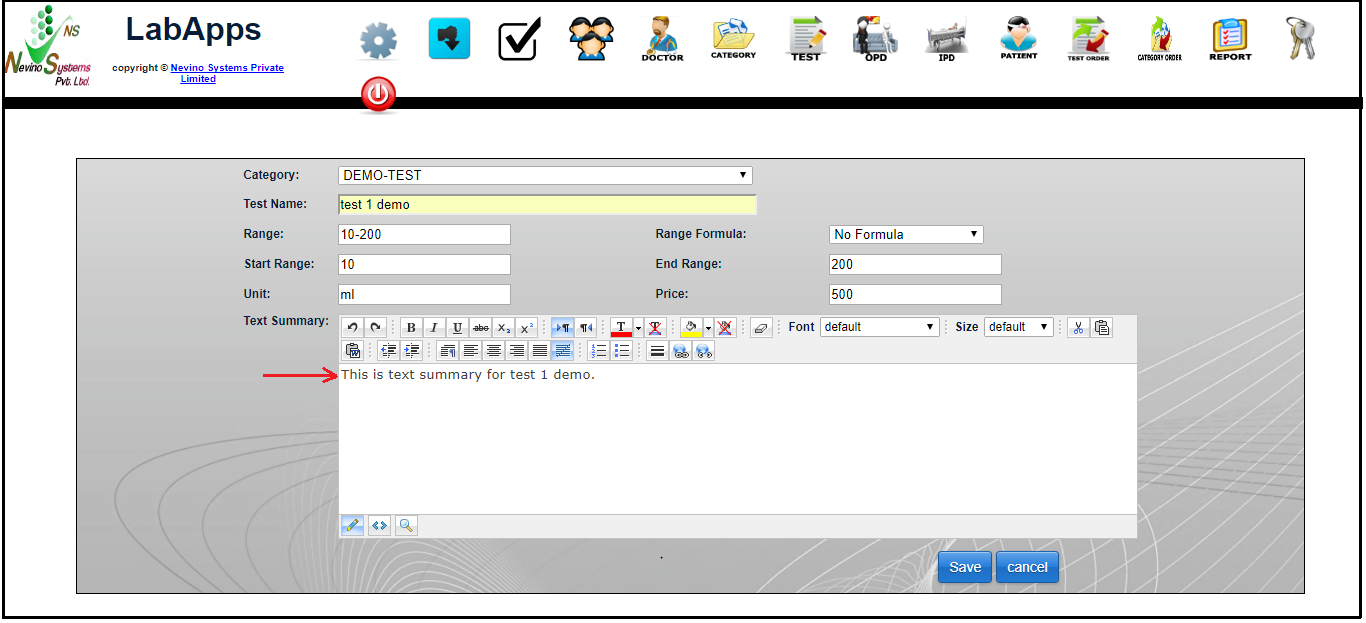
Step 13. Next box is for summary of the test which we can enter inside the ‘Text Summary’ box as shown in image below.
enter test summery

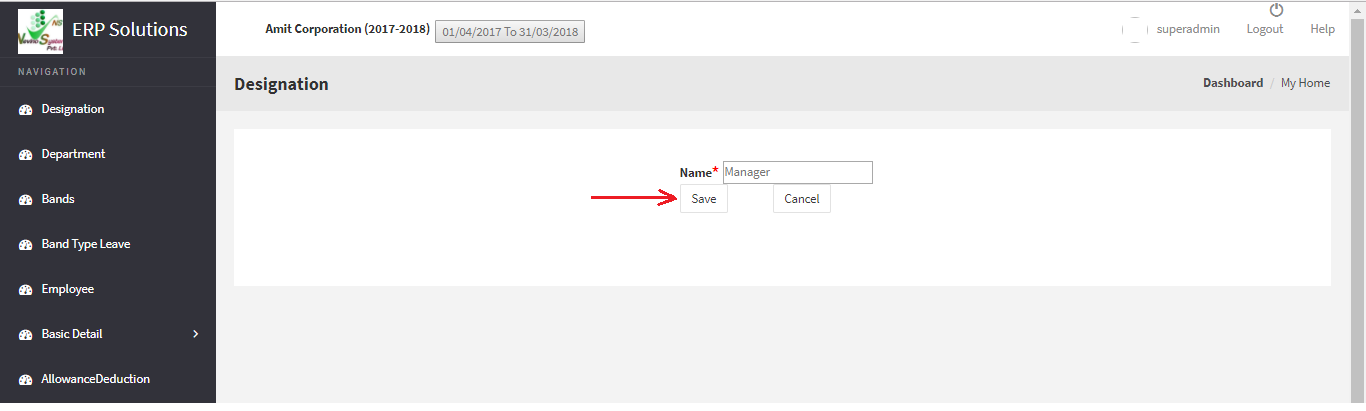
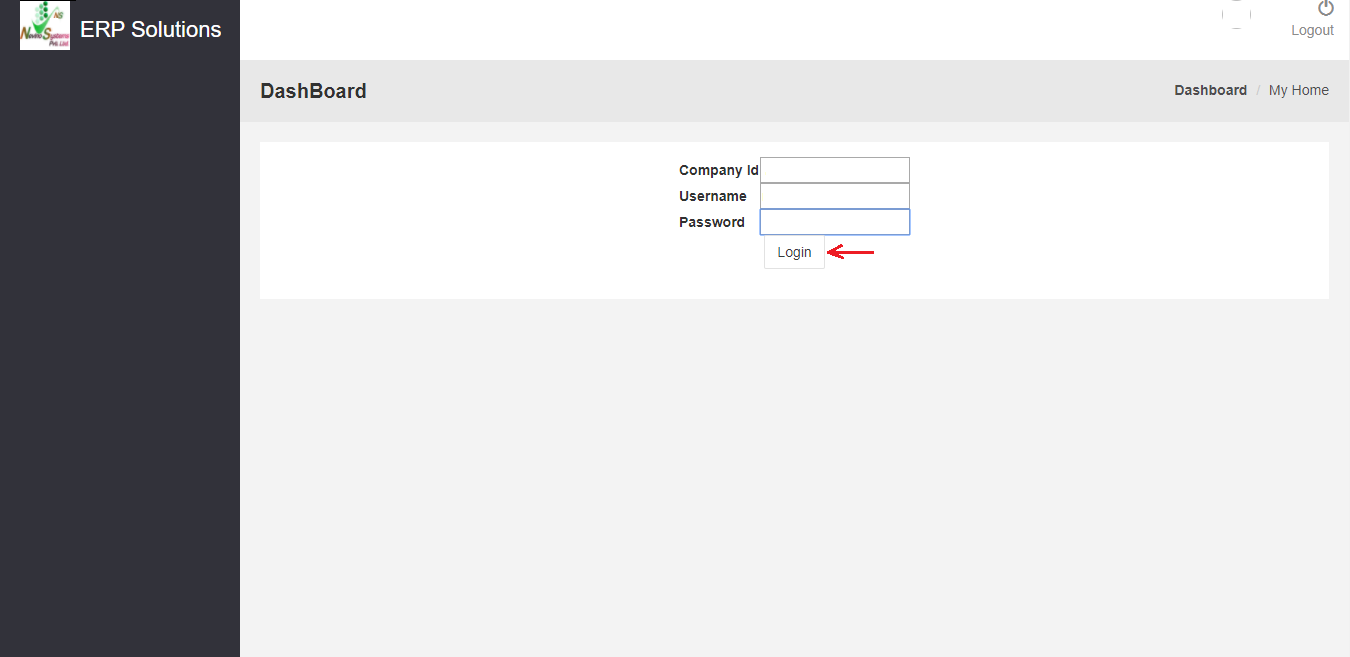
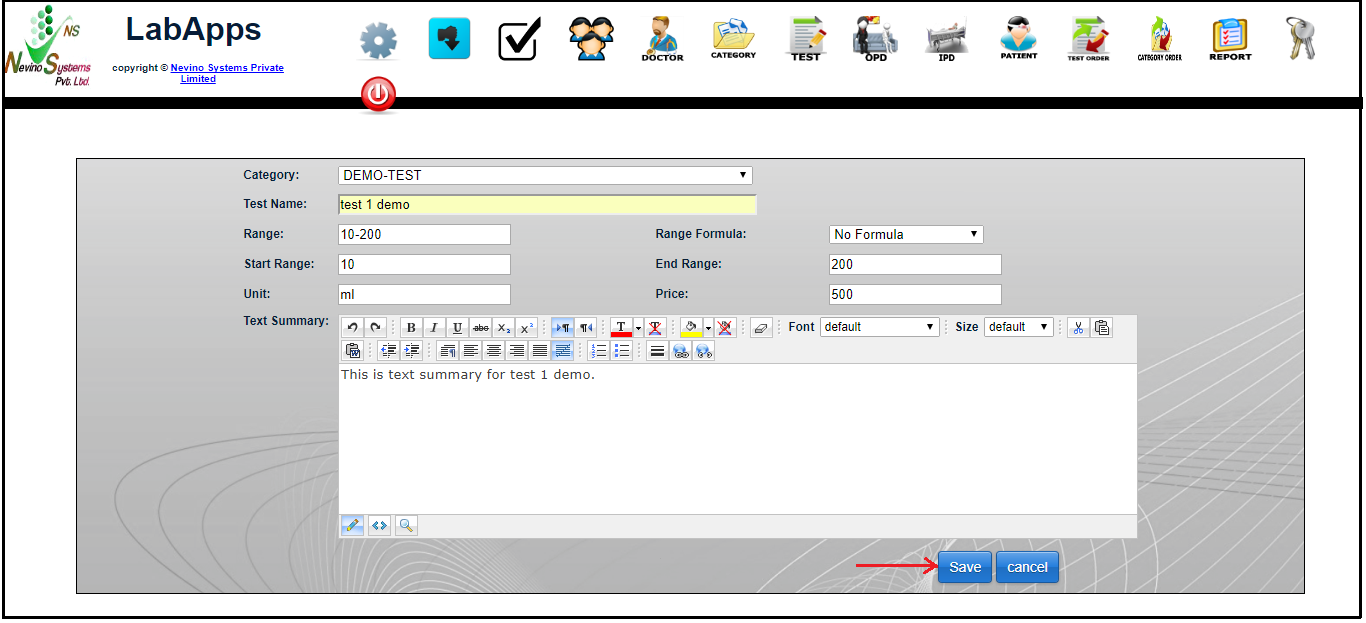
Step 14. Now click on ‘Save’ button in order to save all the entered data as shown in image below.
test save button

Step 15. As the ‘Save’ button is clicked all the data will saved and a new window will appear as below.
all test window

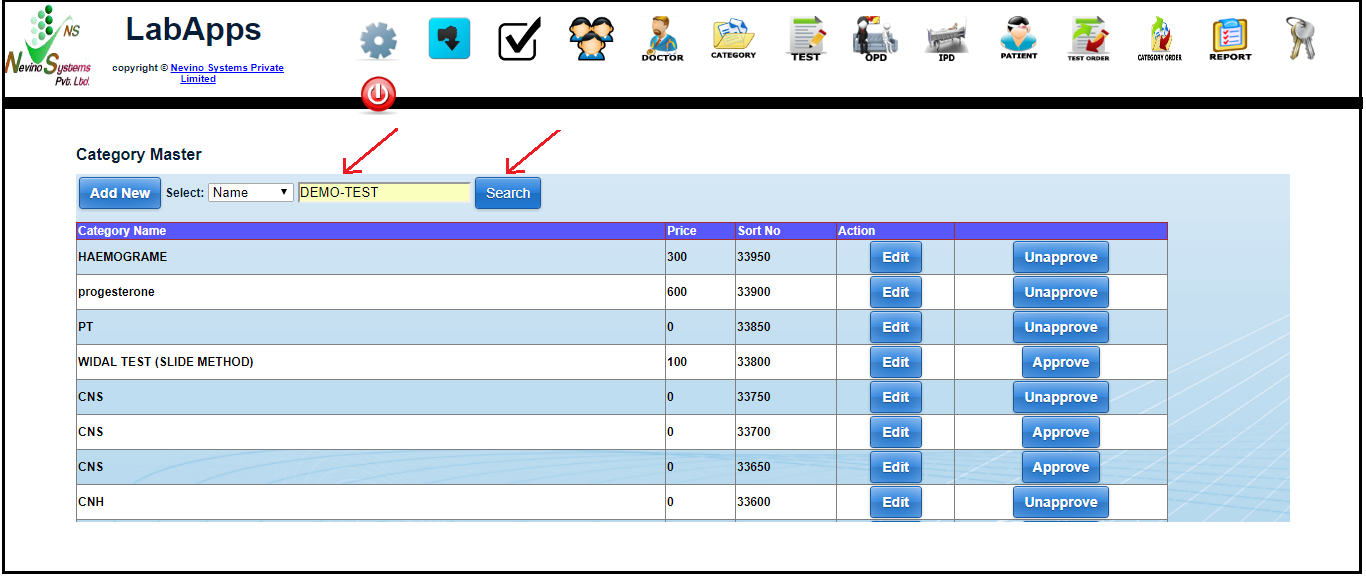
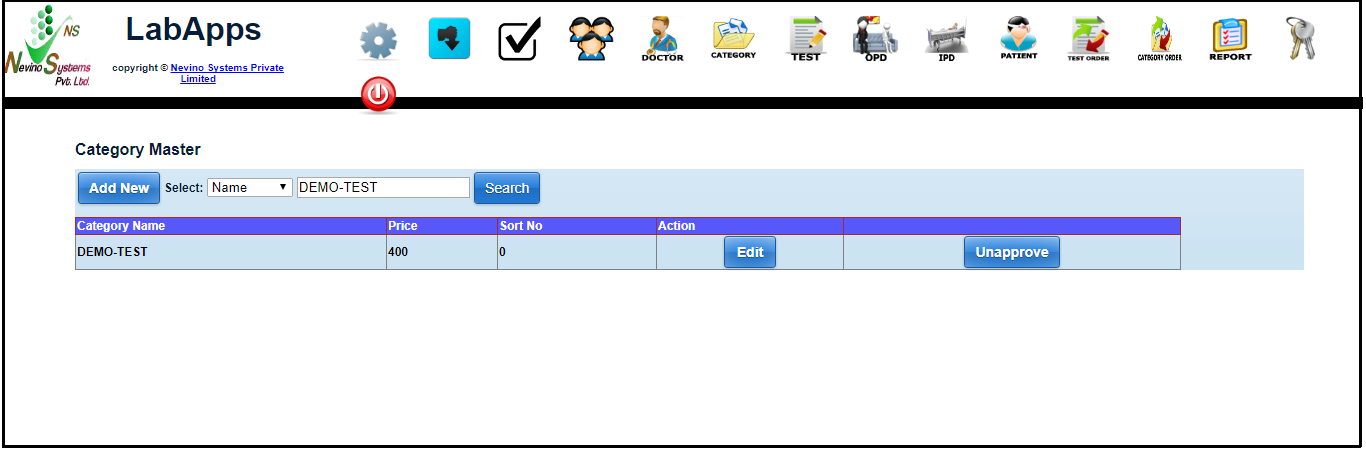
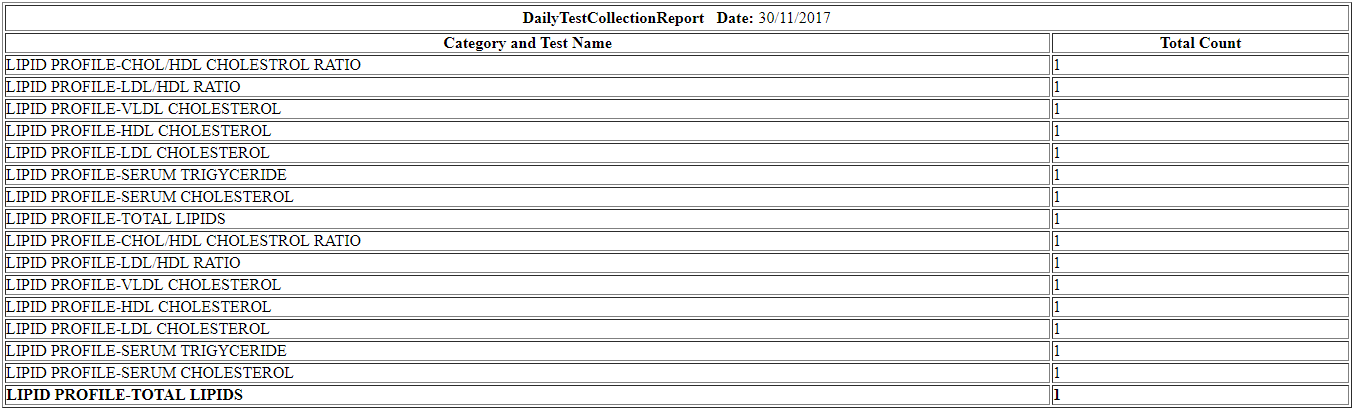
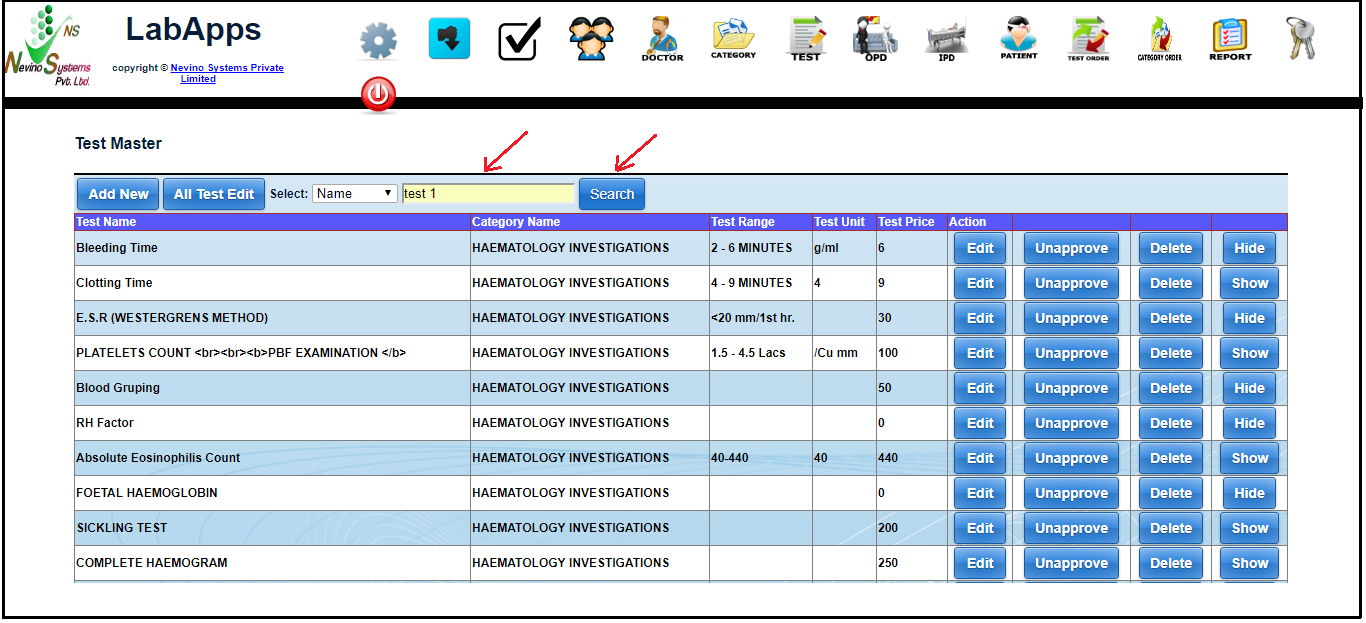
Step 16. To check our saved test enter the name of test in ‘Search’ box and click on ‘Search’ button as shown in image below.
search test name

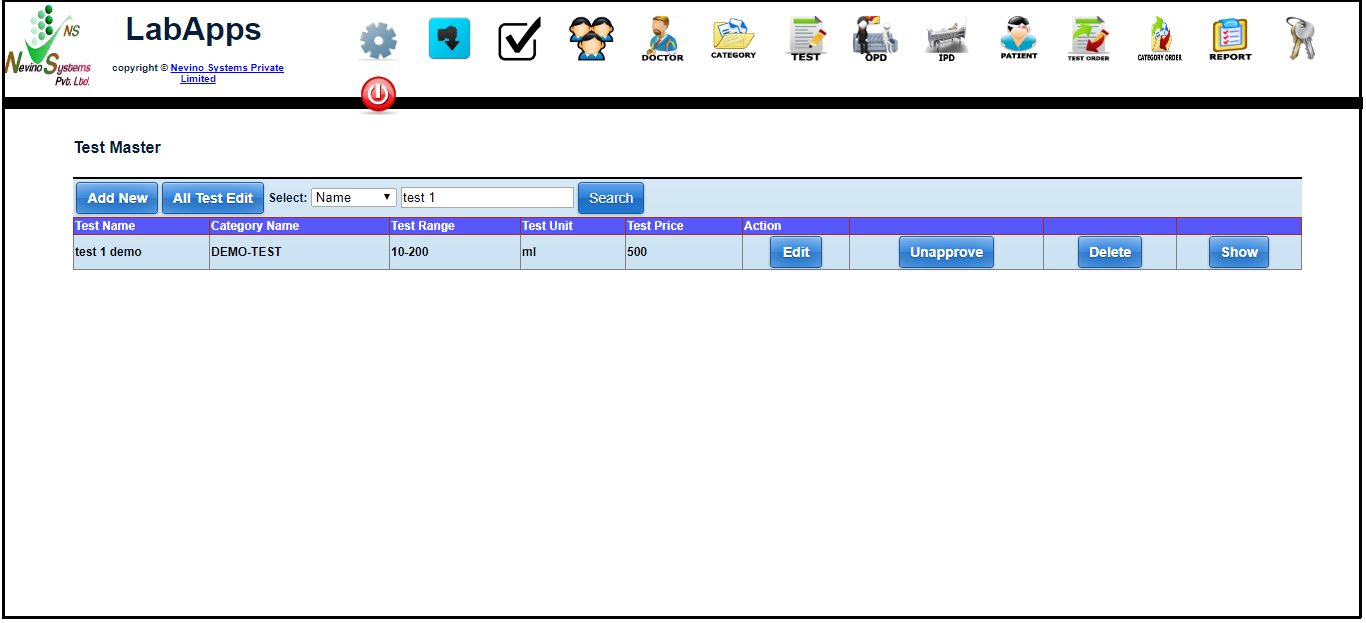
Step 17. On the click of ‘Search’ button test name will be displayed as shown in image below. So in this way you can add test and to add more tests you can follow above mentioned steps.
new test name displayed


Click Here To Buy Nevino Lab Software


* The Content stated above is for informational purpose only. Expert Software Team is not responsible if any part of content found meaningless in any manner or condition.

How to edit New Test Category in Nevino Lab Software

When we have added new test category in nevino lab software then there may be need to edit its name in future as per requirement. So to do that we will now learn about how we can edit new test category in nevino lab software.

Click Here To Buy Nevino Lab Software

Step 1. We start with main window of Nevino Lab Software where we will click on ‘Category’ as shown in image below.
lab main dashboard

Step 2. Then a new window will appear as shown in image below.
category window

Step 3. Now enter the test name in blank box of ‘Search’ button and then click on this button.
search category

Step 4. A window as below will appear where we will click on ‘Edit’ button as indicated in image below.
category edit button

Step 5. On the click of ‘Edit’ button a window displayed as below will appear where you can edit any information as per requirement and again click on ‘save’ button to save the newly entered data. In this way you can edit new test category.
category save buttton

Click Here To Buy Nevino Lab Software

* The Content stated above is for informational purpose only. Expert Software Team is not responsible if any part of content found meaningless in any manner or condition.

How to add New Test Category in Nevino Lab Software

We can add any new test category in nevino lab software whenever there is need to add new test as per requirement of Lab. So now we learn that how to add new test category in nevino lab software.

Click Here To Buy Nevino Lab Software

Step 1. On the Nevino Lab Software main window click on ‘Category’ as indicated in the image below.
lab main dashboard

Step 2. Then a new window will open where you have to click on ‘Add New’ as indicated in below image.
add category button

Step 3. On the click of ‘Add New’ button a new window will open as shown in image below.
add category window

Step 4. First we will enter the ‘Category’ for example we will add category name as ‘DEMO-TEST’ as shown in image below.
add category name

Step 5. Next we will add the price of test so for example we will add price as ‘400’ as per below image.
price of test

Step 6. Now we will enter the summary for test as shown in below image. For example we will add ‘This is DEMO-TEST summary’.
category summery

Step 7. When summary is entered click on ‘Save’ button as indicated in the image below.
category save button

Step 8. On the click of ‘Save’ button all the entered data will be saved and a new window will open as shown in below image.

category window

Step 9. If we want to see that whether our new test category is saved then we will enter its name in ‘Search’ box and click on Search button as shown in below image.
category name search

Step 10. On the click of search button the name of new test category will be displayed as shown in below image.
category name displayed

Click Here To Buy Nevino Lab Software

* The Content stated above is for informational purpose only. Expert Software Team is not responsible if any part of content found meaningless in any manner or condition.

How to generate Daily Test Collection report in Nevino Lab Software

To see the number of tests conducted on daily basis we will see the daily test collection report. So now we learn how we can generate the daily test collection report in nevino lab software.

Click Here To Buy Nevino Lab Software

How to generate Monthly Test Collection report in Nevino Lab Software<< Already gone through this page >>How to add New Test Category in Nevino Lab Software

Step 1. From the main window of Nevino Lab Software click on ‘Report’ as shown in image below.
lab main window

Step 2. Now click on ‘Select’ as indicated in the image below.
select report

Step 3. Select ‘Daily Test Collection’ report as shown in image below.
test collection window

Step 4. When ‘Daily Test Collection’ is selected a window as below will appear.
select daily test collection

Step 5. Select the date by clicking on the ‘calendar’ icon as indicated below.
select date

Step 6. Now select the category of test. For example we will select ‘Lipid Profile’ as shown below.
select category
Step 7. Next we will select the ‘Test’ as ‘All’ as we want to see all the tests as shown below.

Step 8. Now click on ‘Generate’ button as per below image.
generate button

Step 9. When ‘Generate’ button is clicked then report is displayed on new window as per below screen.
daily test collection report

Click Here To Buy Nevino Lab Software

* The Content stated above is for informational purpose only. Expert Software Team is not responsible if any part of content found meaningless in any manner or condition.

How to generate Monthly Test Collection report in Nevino Lab Software

Now we will generate report to know how many times every test was conducted in the past month. So we will learn how to generate monthly test collection report in nevino lab software.

Click Here To Buy Nevino Lab Software

How to generate Monthly Test Collection report in Nevino Lab Software<< Already gone through this page >>How to generate Daily Test Collection report in Nevino Lab Software

Step 1. We start with the main window of Nevino Lab Software where we will click on ‘Report’ as indicated below.
;ab main window

Step 2. Now click on ‘Select’ as shown in below image.
select report

Step 3. As we want to see monthly collection report so we will click on ‘Monthly Test Collection’ as per below image.
monthly test window

Step 4. When ‘Monthly Collection’ is selected a new window will open as below.
select monnthly test report

Step 5. Select the start date by clicking on ‘From’ as shown in image below.
select from date

Step 6. Now select the end date by clicking on ‘To’ as per below image.
select to date

Step 7. Next we select the category of test. For example we want to see all the tests so we select ‘All’ from the drop down list as shown below.
select test category

Step 8. After selecting the category click on ‘Generate’ button as indicated in the image below.
generate button

Step 9. On click of generate button report as below will appear in new window.
select monthly test report

select monthly report2

select monthly report

* The Content stated above is for informational purpose only. Expert Software Team is not responsible if any part of content found meaningless in any manner or condition.