How to create Repository using Command Prompt and doing Sparse Checkout

It is amazing to know that we can create repository with command prompt also. So in this lesson we will learn ‘how to create repository using command prompt’. Moreover, sometimes there are requirements to show or hide the working copy on network using SVN. So to accomplish this we will go through ‘how to do sparse checkout’.

How the Context menu and icons look like in SVN<< Already gone through this page >>How to do Sparse update with Update to Revision

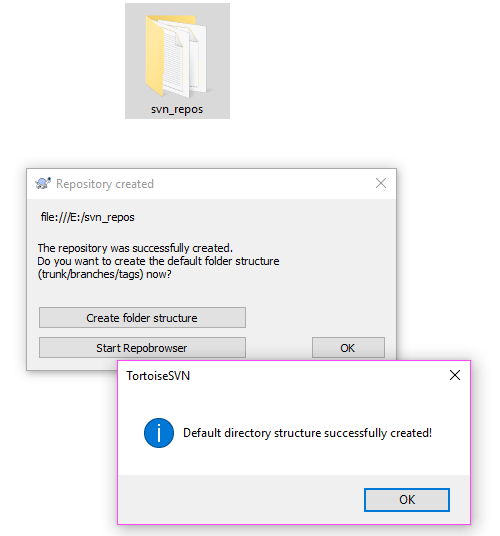
Creating repository using command prompt
 
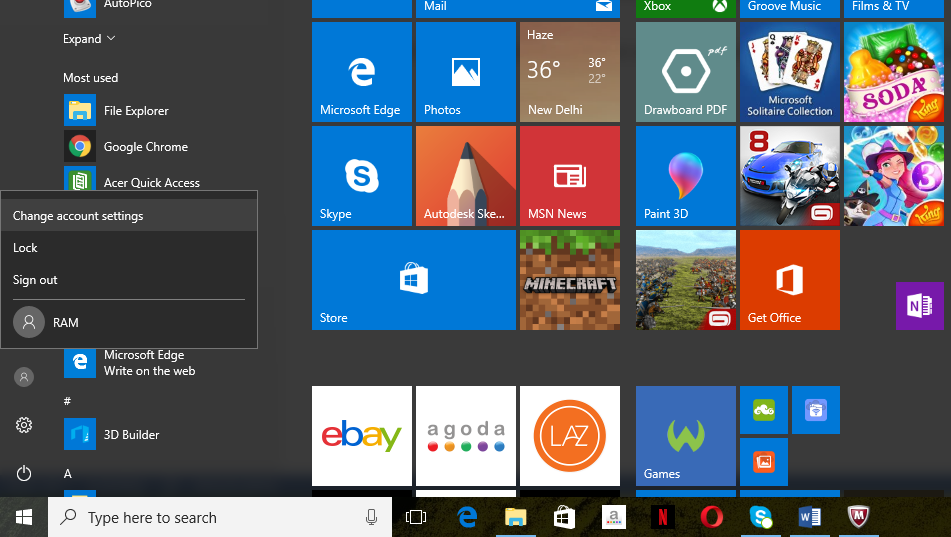
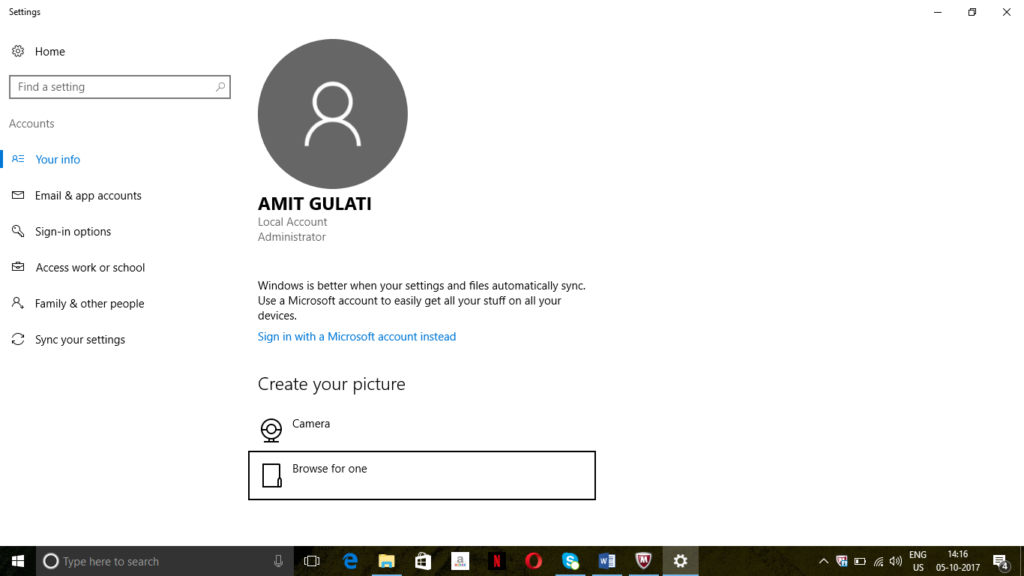
Step 1. Create a new folder for example as SVN in ‘D’ drive or in any drive as comfortable. Open the command prompt by pressing two keys Win+X, a window as below will appear.
opening-command-prompt-from-start
 
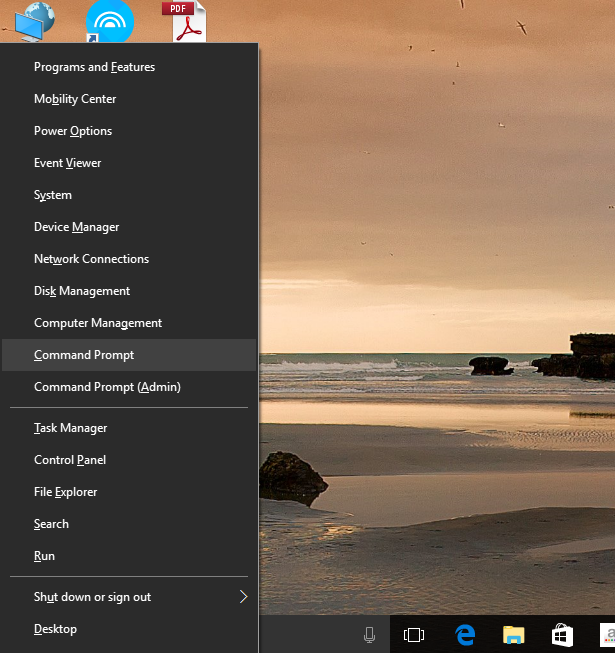
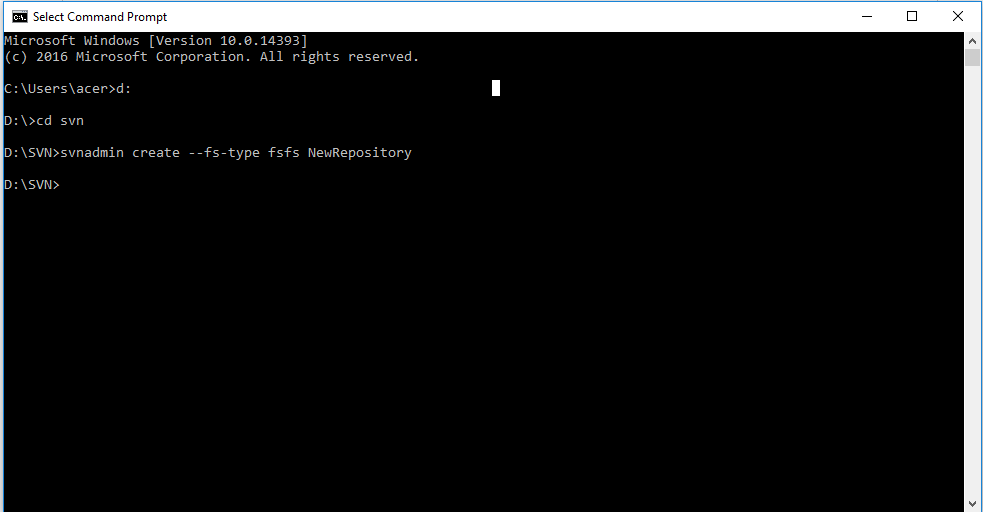
Step 2. A command prompt window will appear as below.
command-prompt-window
 
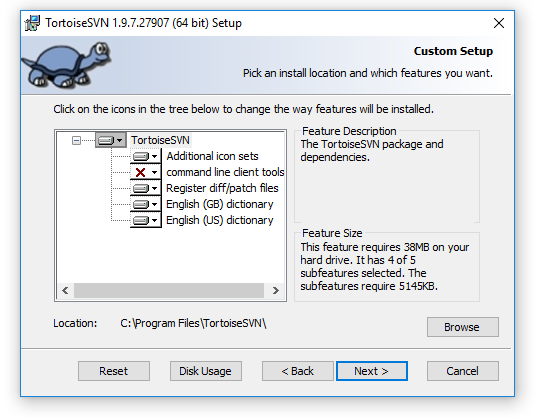
Step 3. Now type the following command as below and press enter

->D:\SVN>svnadmin create –fs-type fsfs NewRepository

Now ‘NewRepository’ folder is created as a ‘repository’ in the same drive under SVN folder.
creating-svn-repository-in-command-prompt
 
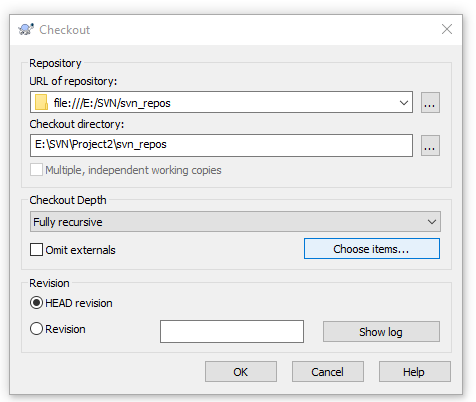
Step 4. Sparse Checkout
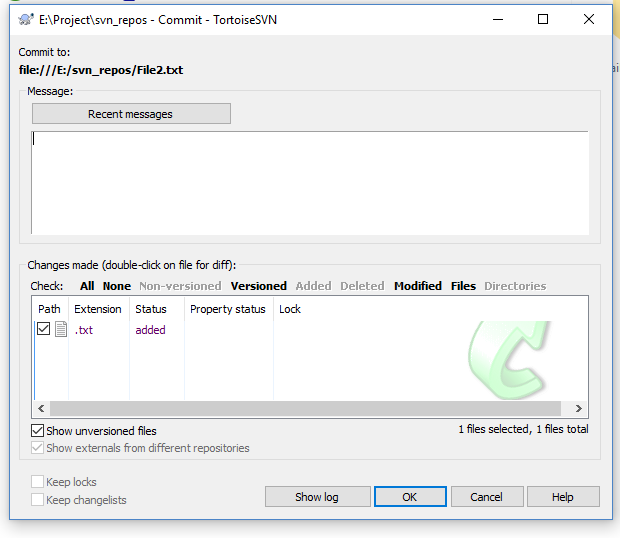
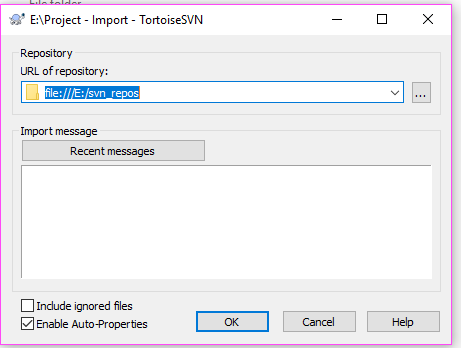
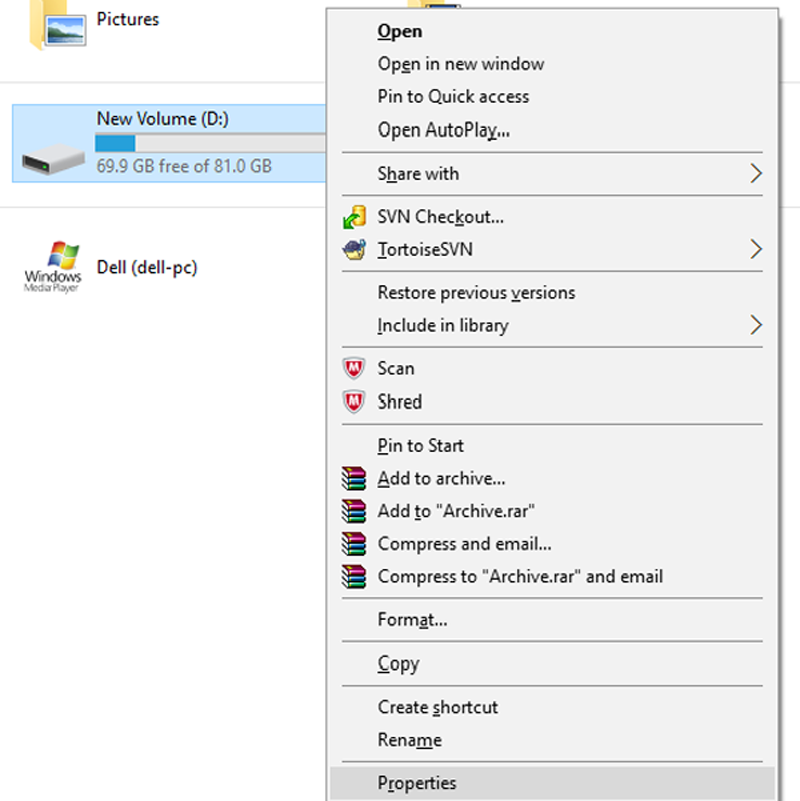
When you select a directory where you want to place your working copy, right click on that folder and select ‘SVNCheckout’ then window will appear as below
svn-checkout-window
 
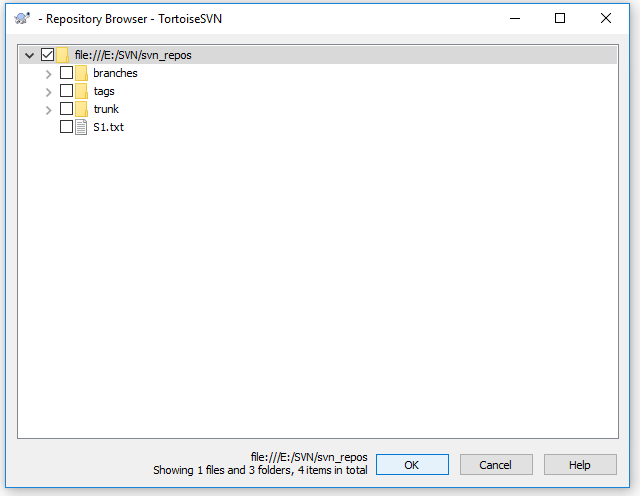
Step 5. Select ‘Choose items’ a new window will appear as below, select the file which you want as a working copy and press ‘OK’. Only selected files will be shown under working folder.

repository-browser-window

How the Context menu and icons look like in SVN<< Already gone through this page >>How to do Sparse update with Update to Revision

* The Content stated above is for informational purpose only. Expert Software Team is not responsible if any part of content found meaningless in any manner or condition.

How the Context Menu and Icons look like in SVN

Here is a clear picture of ‘How the Context menu look like in SVN’ where we can see all the major commands usable for working with SVN. Also you will be able to see various ‘Icon overlays’ in further working of SVN as per icons image down below about which we will discuss in our coming lessons. Two icons for add file and versioned file with green tick already discussed in previous lessons.

How to add new files in working folder<< Already gone through this page >> How to create repository using command prompt and sparse checkout

1.Context Menu

2.Icon Overlays

 
How to add new files in working folder<< Already gone through this page >> How to create repository using command prompt and sparse checkout

* The Content stated above is for informational purpose only. Expert Software Team is not responsible if any part of content found meaningless in any manner or condition.

How to add new files in working folder and check logs

There always been changes in projects where we add new files to our project. So now we learn ‘How to add new files in working folder’ and ‘How to check Logs in SVN’ as per below steps.

How the working copy functions<< Already gone through this page >>How the Context menu and Icons look like in SVN
 
Step 1. Now we add new files to it. For example create a new file inside the ‘svn_repos’ folder as ‘file2’, right click on it drag to TortoiseSVN and click on ‘Add’ by dragging to it. New file appear as below screen shot. It shows that this file is not committed. So right click on the same file and click on SVNcommit and down below screen will appear.


Step 2. Now after pressing OK FILE2 will appear as below.

How to check the SVN Logs
 
Step 3. To see modified versions and added files right click on ‘svn_repos’ drag to ‘TortoiseSVN’ and then to ‘show log’, just click on it. A window as below will appear. Red marks shows the modified files and blue mark shows the added files.

Step 4. When the file is not commit we can undo the file addition by right click on
file ->TortoiseSVN->Revert.

 
How the working copy functions<< Already gone through this page >>How the Context menu and Icons look like in SVN

* The Content stated above is for informational purpose only. Expert Software Team is not responsible if any part of content found meaningless in any manner or condition.

How the working copy functions (SVN Commit)

When working copy is ready we must understand how to work on it so that we get information about every modification. To learn it we go through ‘How the working copy functions’ as per below steps.

How to create working copy<< Already gone through this page >>How to add files in working folder
 
Step 1. Now make changes or write something new in green ticked file1 and save it, you will see a red mark on your file like below screen shot. It shows that changes have been made in the file but not saved in repository. While mark is red a ‘Diff’ option is available by right click on file1, click on TortoiseSVN and drag to Diff. You will able to see the change before and after as per another window below.


Step 2. So now right click on file1 and click on ‘SVN Commit’a window will appear as below. Press OK, new window will be shown as ‘Commit Finished’ as per screen shot down below with revision number.


How to create working copy<< Already gone through this page >>How to add files in working folder

* The Content stated above is for informational purpose only. Expert Software Team is not responsible if any part of content found meaningless in any manner or condition.

How to create Working copy through Checkout command

Now we need a working file to work upon which must maintain previous changes and new changes in it. To know about that we start with ‘How to create working copy through checkout command’.

How to create repository<< Already gone through this page >>How working copy functions
 
Step 1. Now we checkout the folder to make a working copy. Right click on ‘Project’ folder and click on ‘SVN Checkout’. A window will display as below, click OK another window will display as down below which shows checkout finished and again press OK.

 
Step 2. A folder with a green colour tick created inside project folder as below screen shot and inside that folder you will see files as below other screen shot. Now green ticked ‘File1’ is your working copy.


How to create repository<< Already gone through this page >>How working copy functions

* The Content stated above is for informational purpose only. Expert Software Team is not responsible if any part of content found meaningless in any manner or condition.

How to create Repository and Import the project folder

After installation we need a database where we can store our previous version and new version of file. In SVN, a Repository folder acts as a database so now we learn ‘How to create Repository’ plus we will ‘Import the project folder’ which we want to share on network.

Installing the SVN software<< Already gone through this page >>How to create working copy through Checkout command

Step 1.When you have installed Tortoise SVN software in PC, create a folder for example named as ‘svn_repos’. Right click on that folder click on ‘TortoiseSVN’, drag to ‘Create repository here’ and click on it as below.

 
Step 2. After clicking on ‘create repository here’ a dialog box will be displayed as below. Now click on ‘Create folder structure’ and press OK. Another box will be displayed, press OK again. Folder icon will change as below.
Folder icon changed.

Importing the project folder
 
Step 3. Now we import a project or work in repository. For example create a folder named as ‘Project’, inside this folder create a notepad file ‘File1’ and write something in it. Right click on folder now, select ‘TortoiseSVN’-> ‘Import’ and you will see a dialog box as below. Enter the correct address of repository folder and press ok.

 
Installing the SVN software<< Already gone through this page >>How to create working copy through Checkout command

* The Content stated above is for informational purpose only. Expert Software Team is not responsible if any part of content found meaningless in any manner or condition.

How to install SVN on your computer

When a file is shared on network it might be difficult for administrator to maintain previous and newly added data on file. This problem is solved by Subversion (SVN) sytem. To know more we start with ‘How to install SVN on your computer’ as per below steps.
 
Already gone through this page >>How to Create repository in SVN
 
Step 1. Download the TortoiseSVN setup from https://tortoisesvn.net/downloads.html. There are 32 bit and 64 bit setups are available, choose according to your operating system. When the download is complete the setup file will look like as per screen shot below. Double click on it a new screen will be displayed and click on ‘Run’.

 
Step 2. When ‘Run’ is clicked a new screen will appear where you have to click on ‘Next’. On other screen again click ‘Next’.


Step 3. When screen as below appears click ‘Next’.

 
Step 4. Click ‘Install’ to start the installation process as per below screen shot.

 
Step 5. Now your setup is complete you can click ‘Finish’ now.

 
Already gone through this page >> How to Create repository in SVN

* The Content stated above is for informational purpose only. Expert Software Team is not responsible if any part of content found meaningless in any manner or condition.

How to block other users from using local drive

When there are more than one user account on your computer you might want to hide your ‘private data’ on disk drive from other users. So this is possible when you apply below following steps on your personal computer.
 
Step 1. Open my computer by clicking on icon named ‘This PC’ as on desktop screen as below
screen shot.

 
Step 2. When ‘This PC’ window opens right click on the drive you want to block for a particular user and click on ‘Properties’

 
Step 3. A window as below will appear where you need to click on ‘Security’.

 
Step 4. Nowclick on ‘Edit’ button as shown below.

 
Step 5. Screen as below will appear, now click on ‘Add’ button.

 
Step 6. A new screen will appear where you are required to enter the user account name you want to block as shown below and press ‘OK’.

 
Step 7. Now the user account name will be displayed as below in window.

 
Step 8. Click on first box below ‘Deny’ as below, through which all boxes under deny will be ticked automatically then click on ‘Apply’ button and press ‘OK’. Close the disk drive window also.

 
Step 9. Now sign out from Administrator account and login as Raj account. When Raj account is open as below go to ‘This PC’.

 
Step 10. In ‘This PC’ access denied message will appear while accessing disk drive as shown below which shows that user is blocked from accessing the disk drive.

* The Content stated above is for informational purpose only. Expert Software Team is not responsible if any part of content found meaningless in any manner or condition.

How to prepare Purchase Invoice in Nevino Erp Software

How to Prepare Purchase Invoice In Nevino Erp Software.

1. Click on Mrn Gst Menu
2. Click Add Button
3. Enter Bill No
4. Select Date
5. Select Party Name
6. Select Item Name
7. Unit,Hsn Code,Rate will populate automatically
8. Enter Quantity
9. Amount,Discount%,Discount Amount,Cess(%),Cess Amount,CGST(%),CGST Amount,SGST(%),SGST Amount,IGST(%),IGST Amount will populate automatically
10. Click On Save
11. Print will generate

* The Content stated above is for informational purpose only. Expert Software Team is not responsible if any part of content found meaningless in any manner or condition.